I was wondering when I would use 16+ clamps all at once in a practical application. Now I know at least one! Looks great!
Jay - The pictures look great, but I was blown away when I saw that door person.
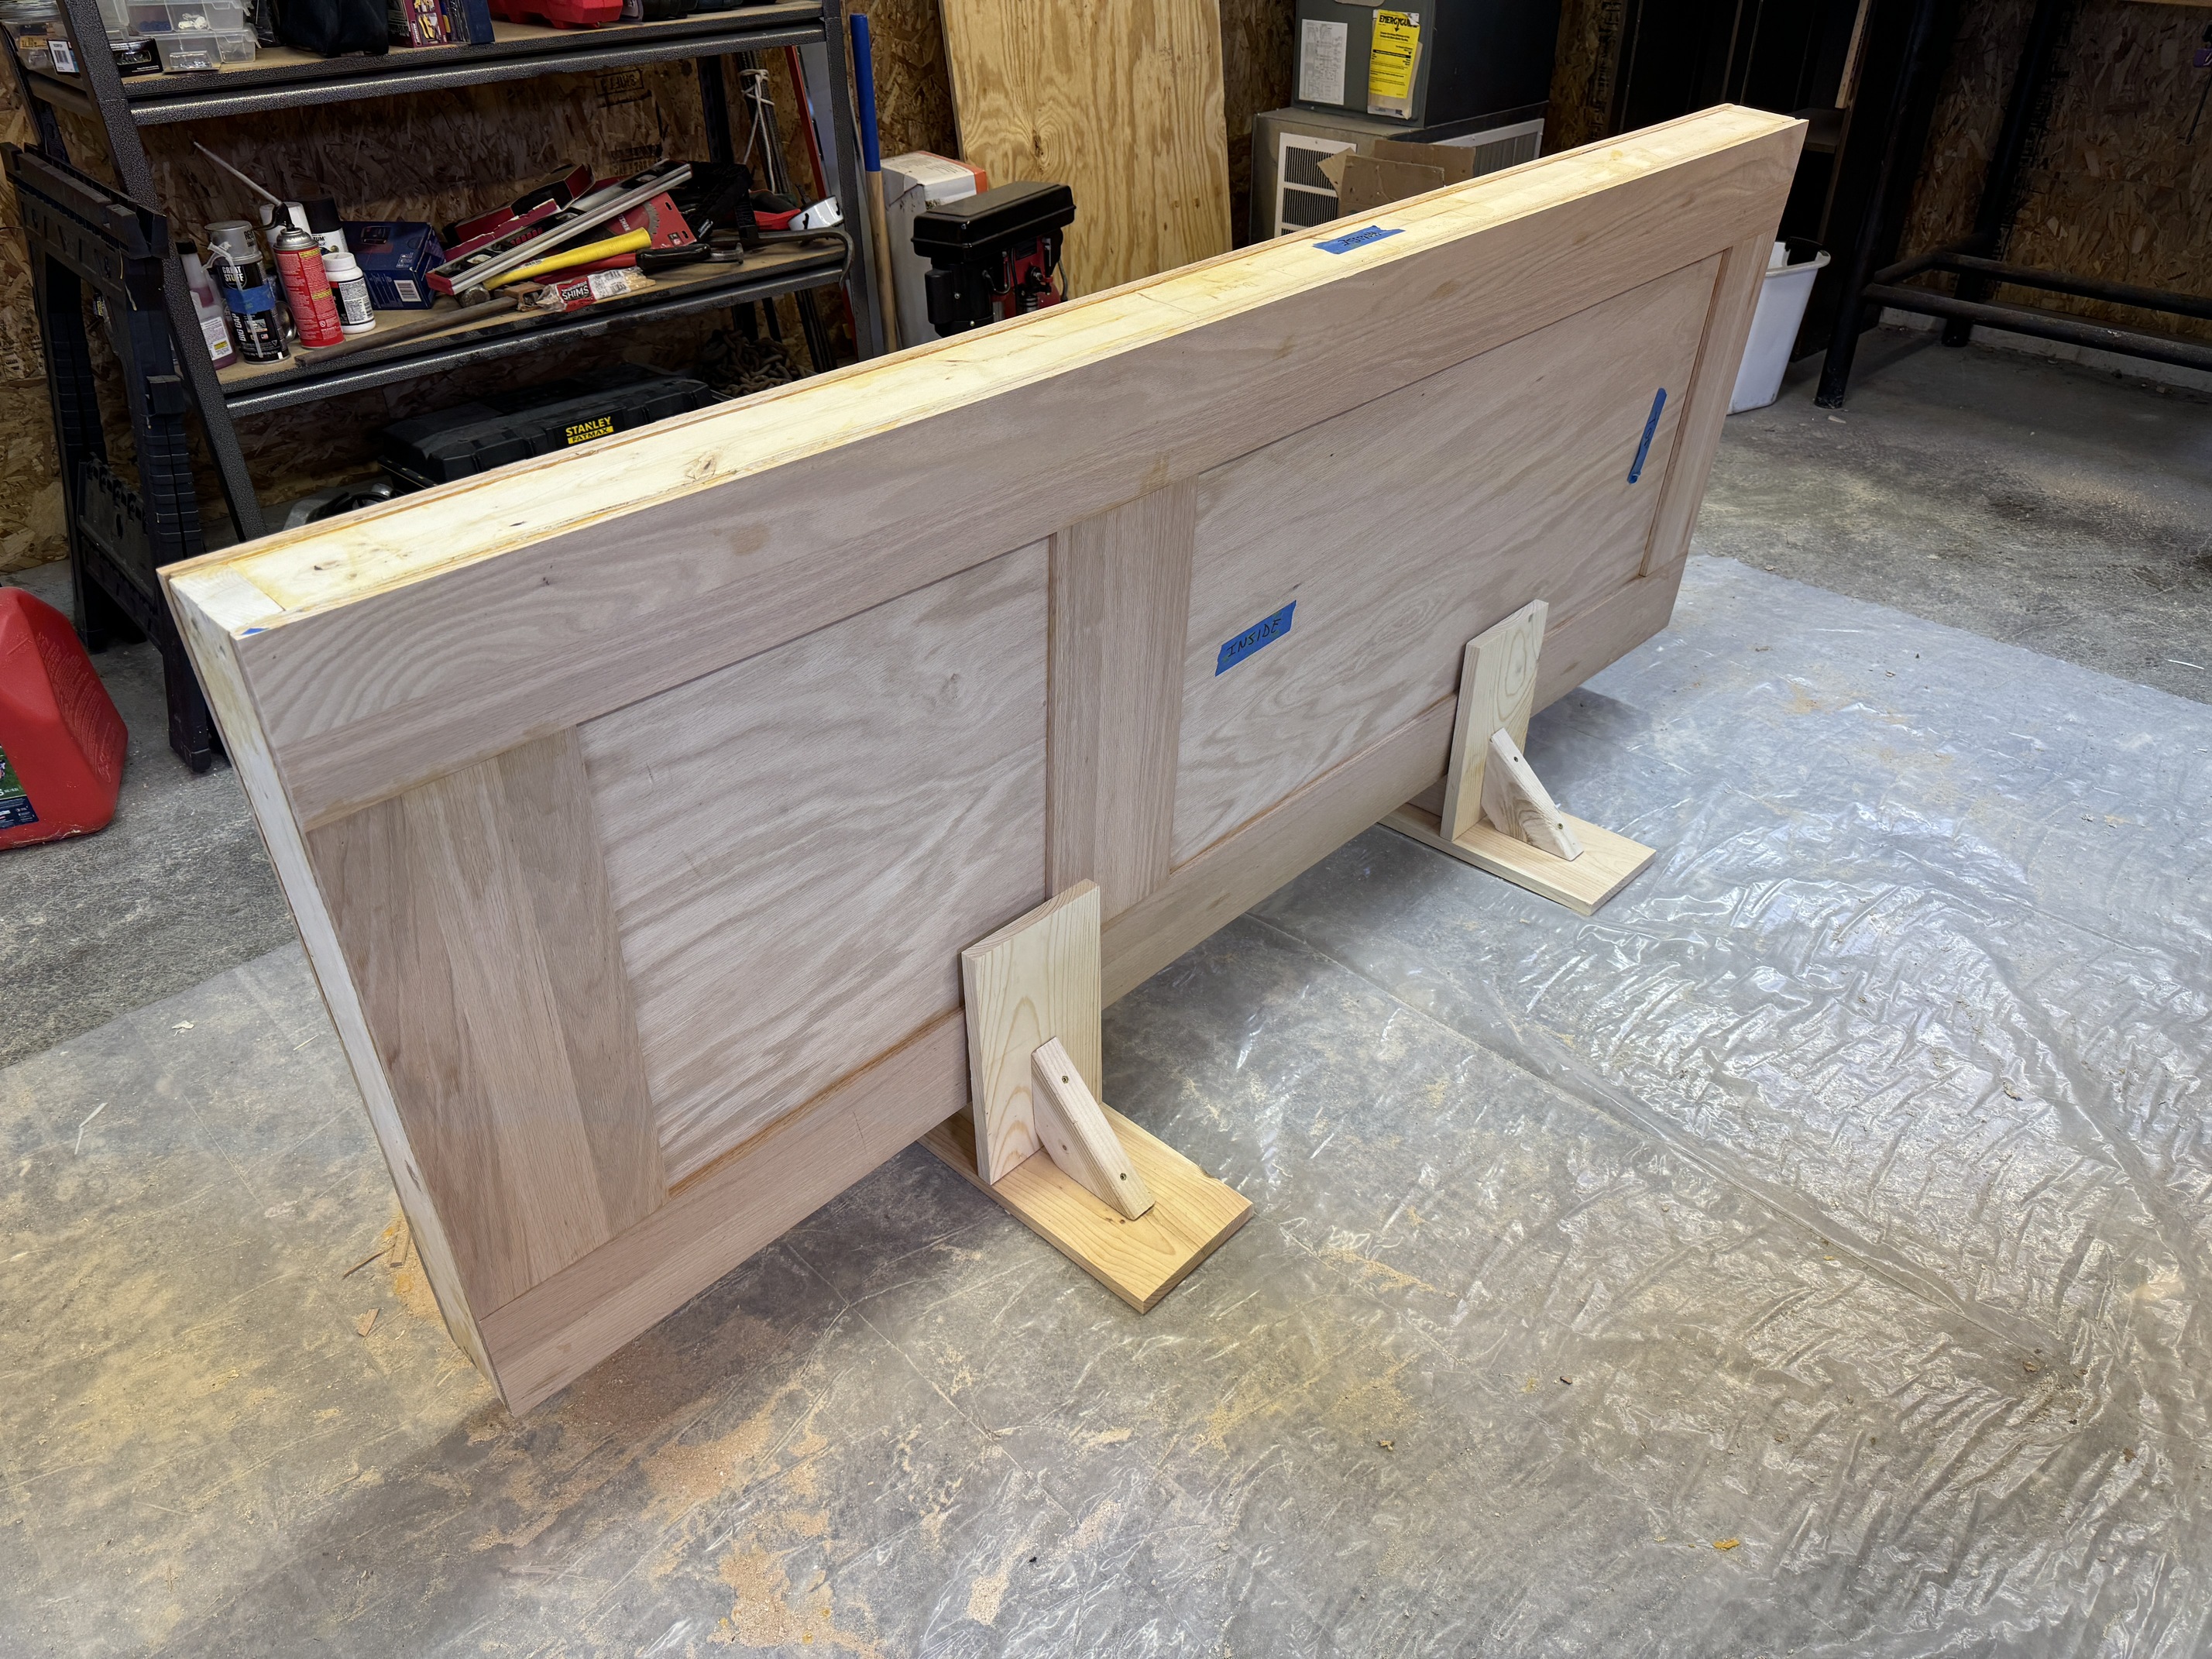
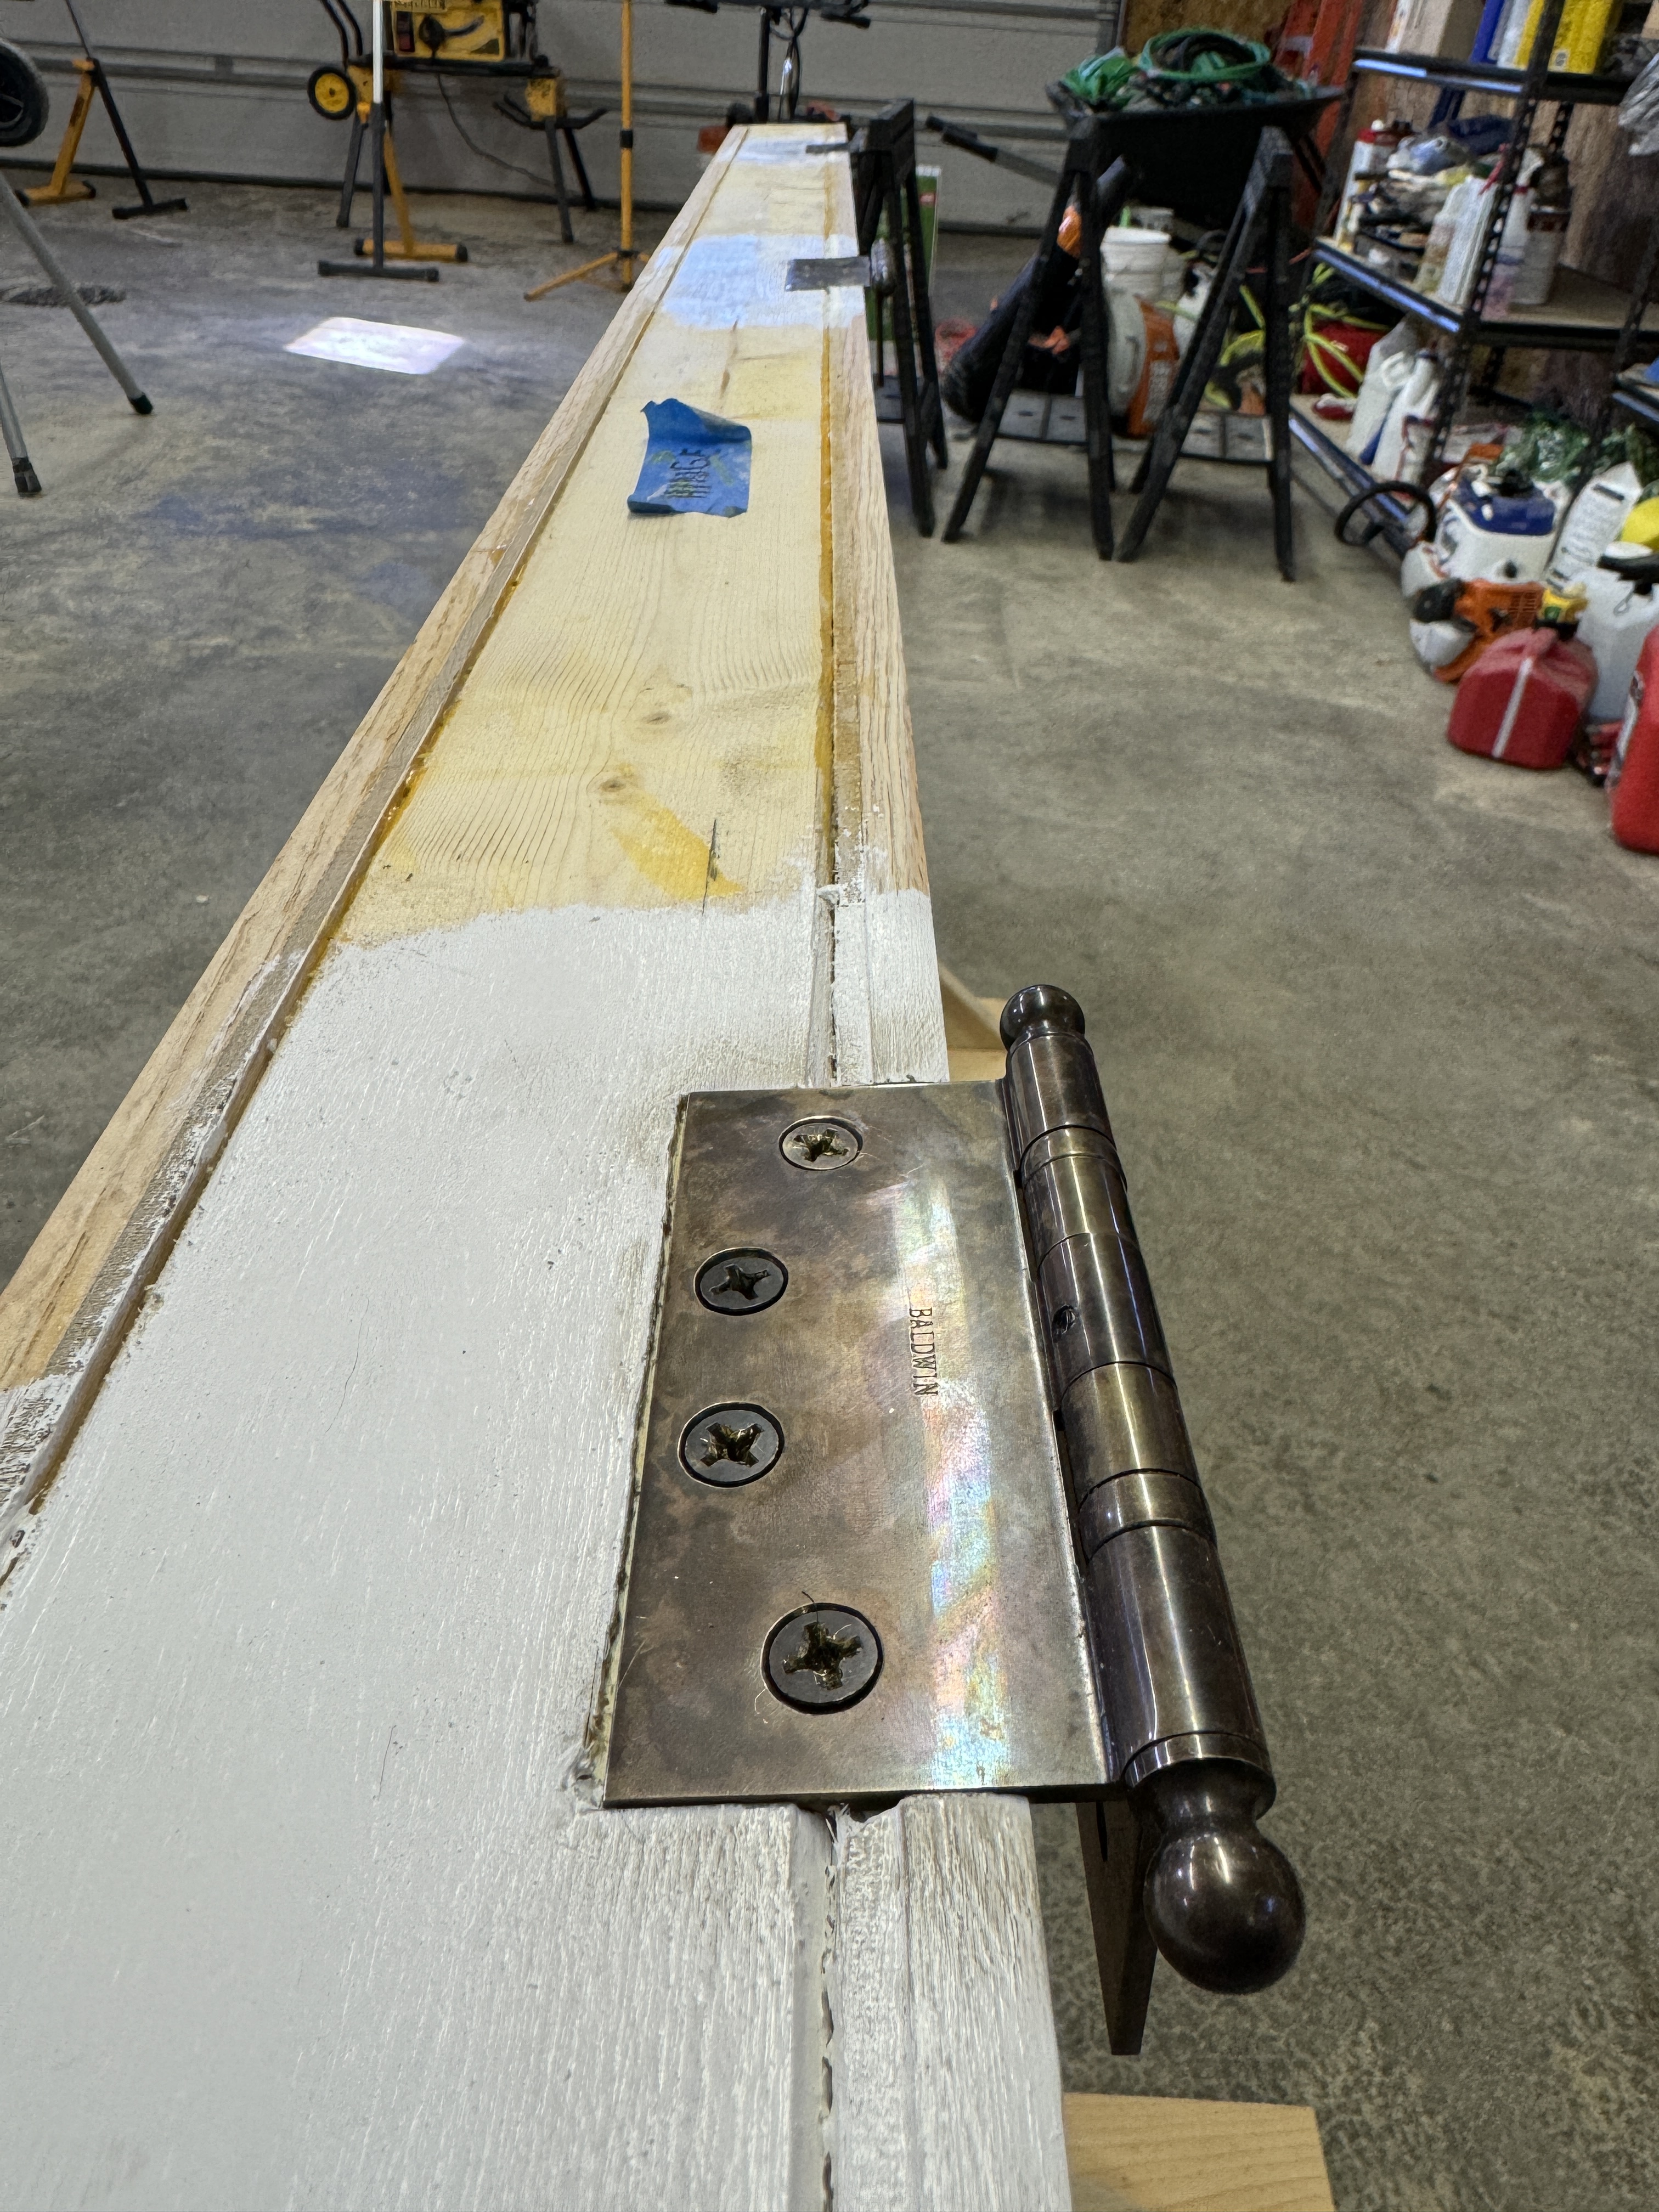
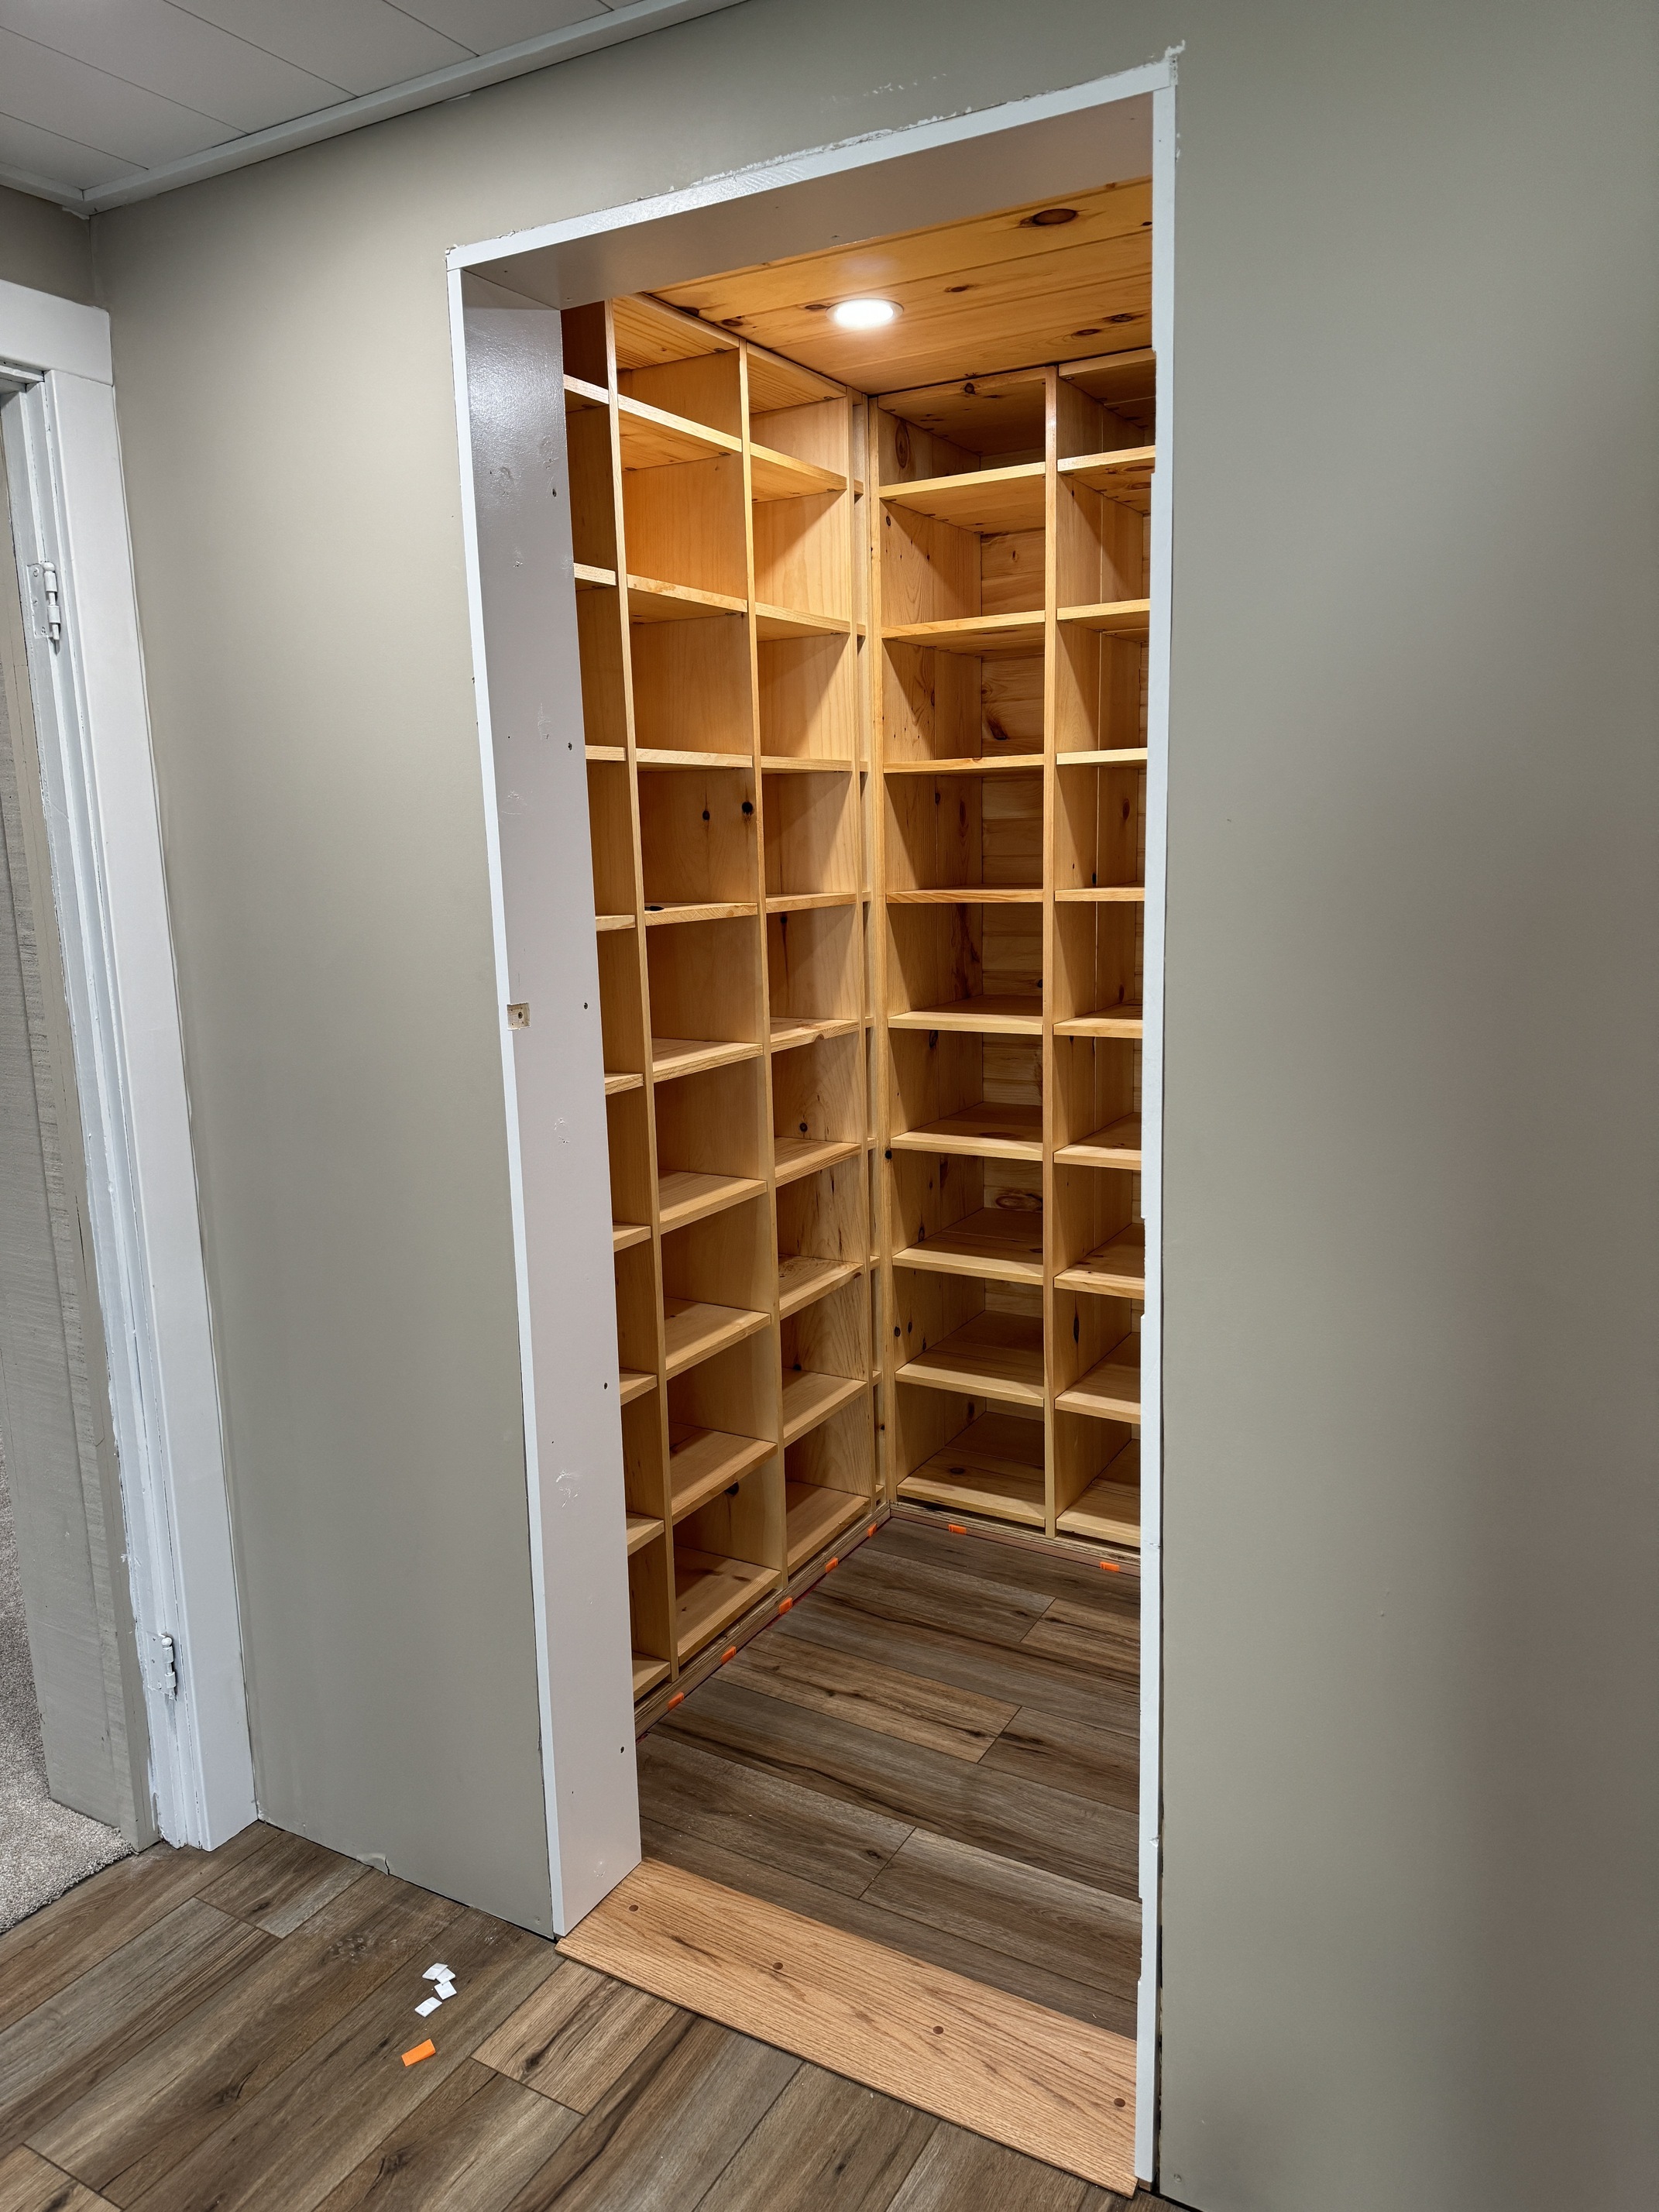
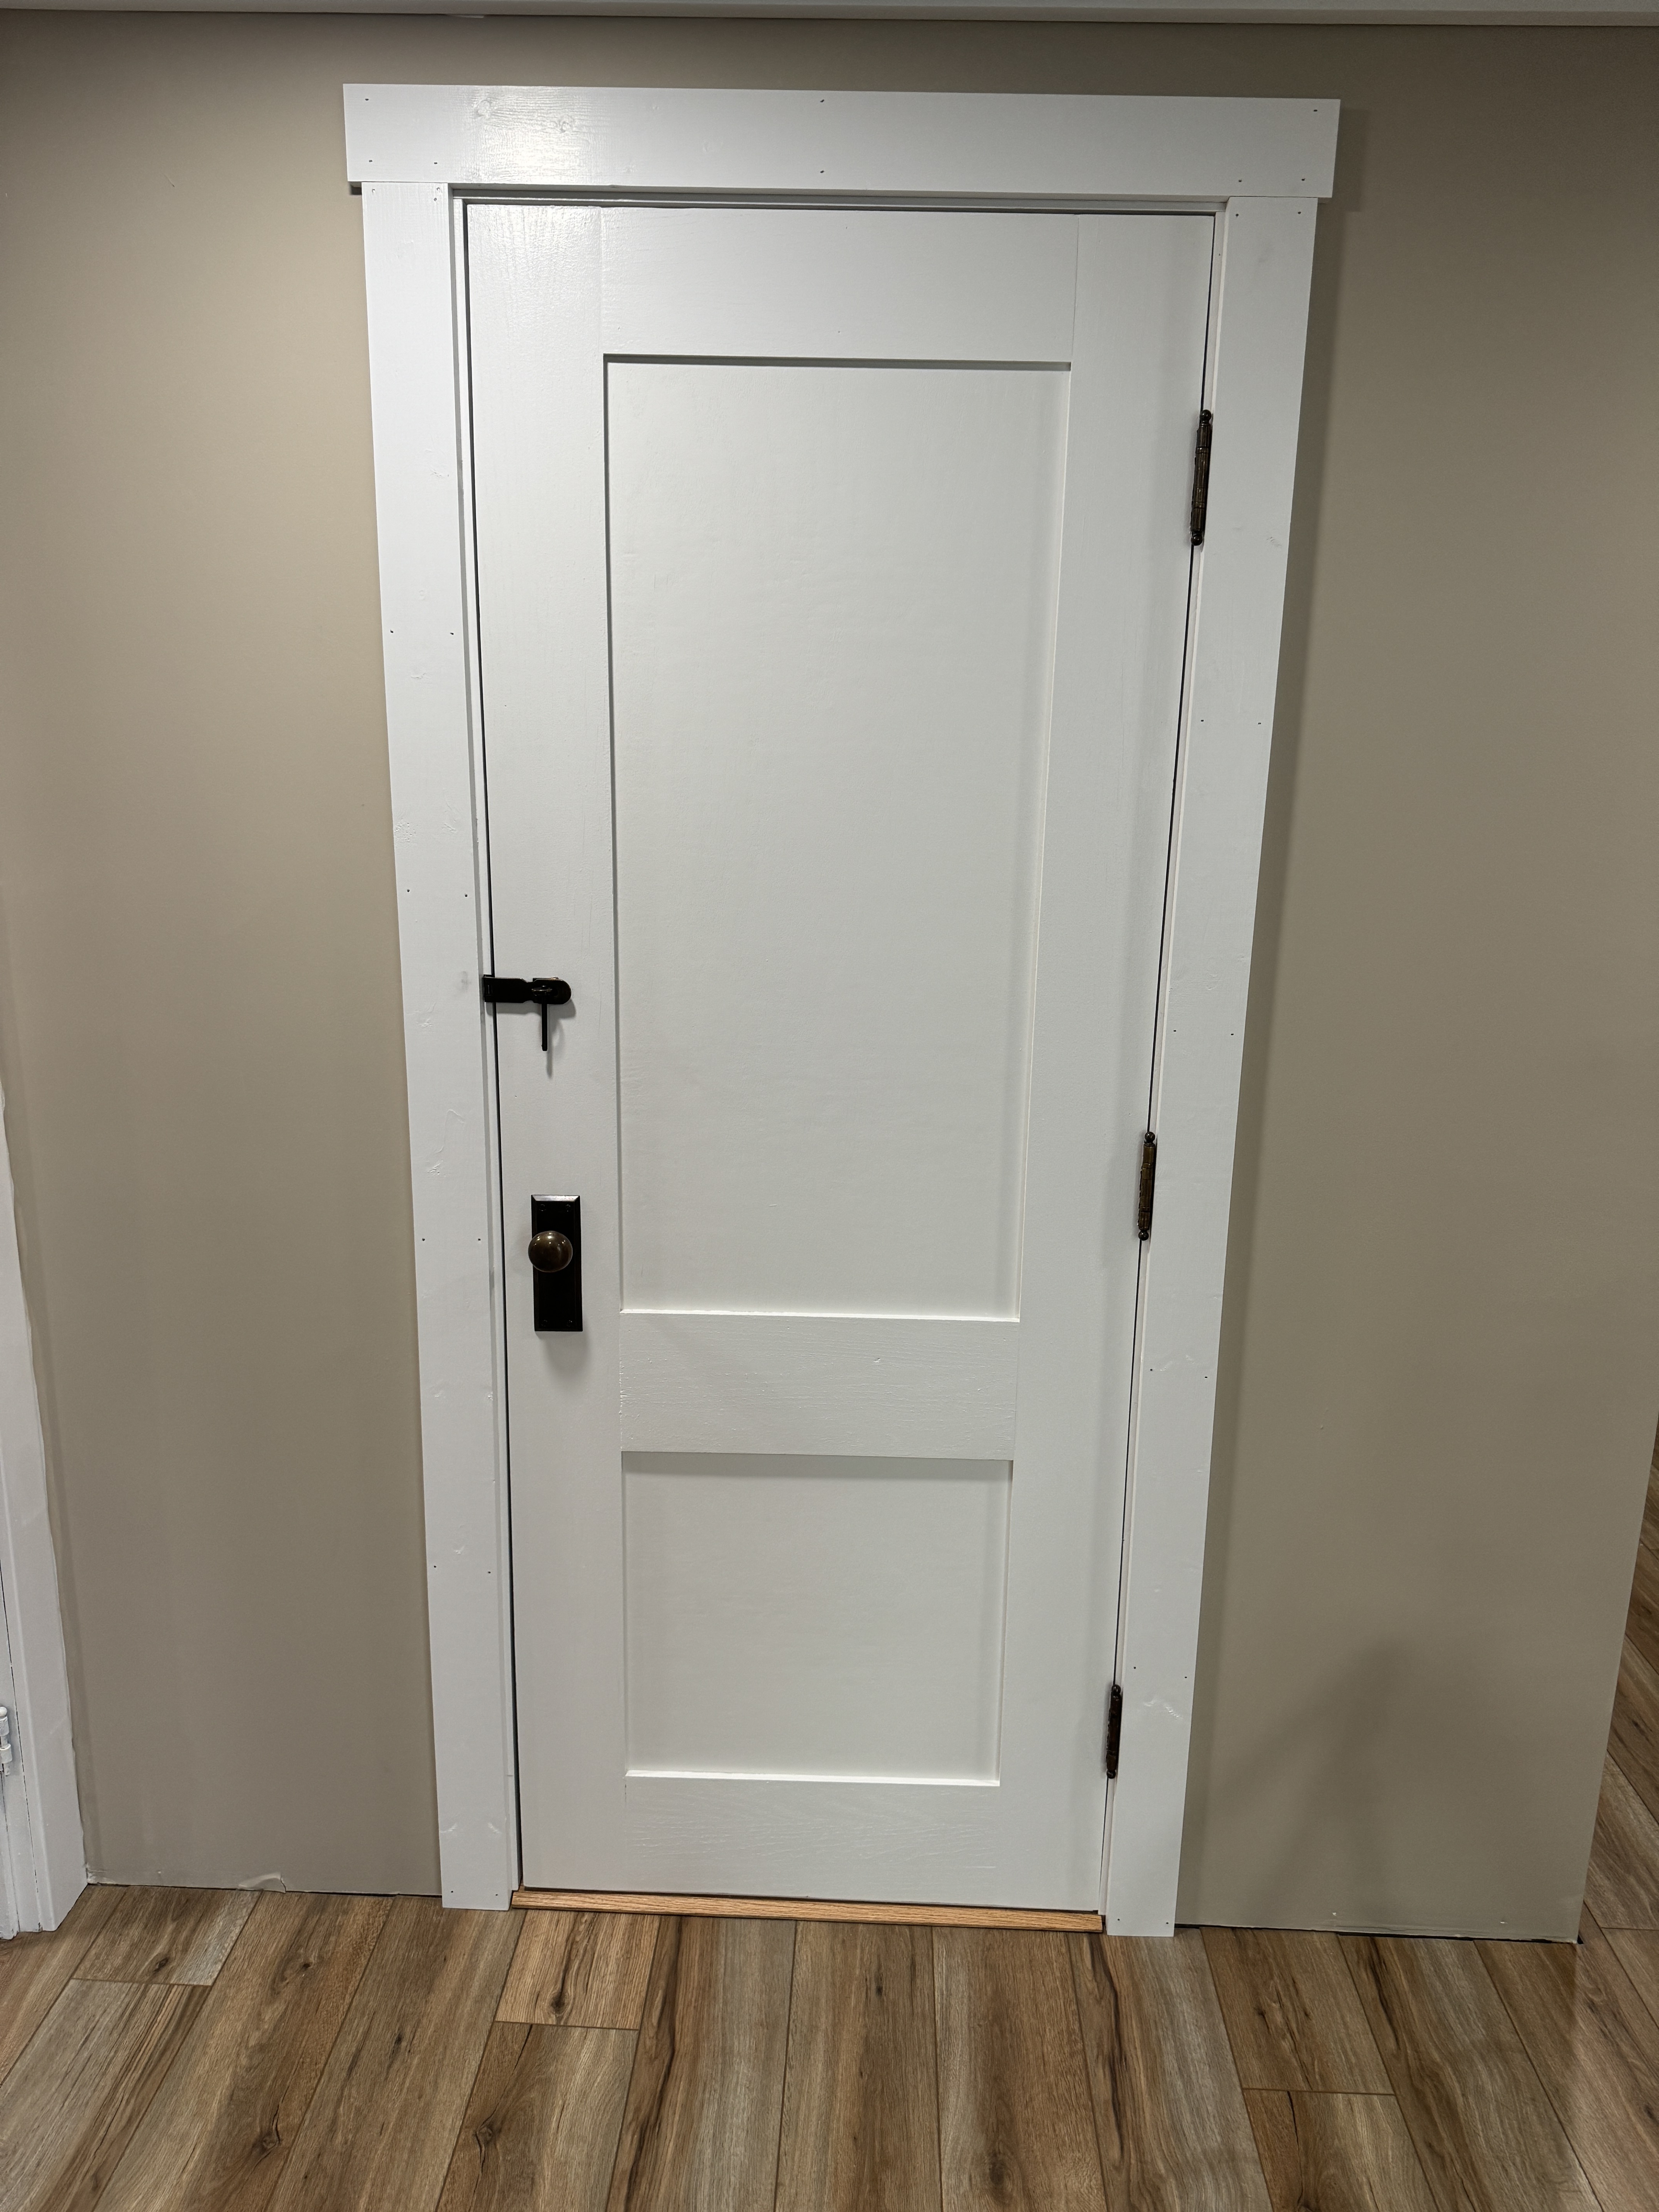
I made more progress on the wine cellar. Last trip up, I routed hinge mortises in the door and door jamb. This weekend I got the door and jamb painted, installed the jamb, and then hung the door with the help of my brother and a friend. With the door hung, it feels like I might actually finish this project someday!


16 Likes
Nice! The only thing left is to have another offline. ![]()
1 Like
Totally off-topic, but this reminds me of a bottle I just purchased, Cantina Tramin Epokale, not very well known but it was the first Italian white wine that got 100 points by RP. After bottling, the wine is brought to a silver mine at 7000 feet, where it ages for 6 years, 3 miles deep in the mine.
If I’m not mistaken, Elena Walch does the same with a few wines. Apparently the altitude and total darkness makes the wine mature in a different way.
1 Like
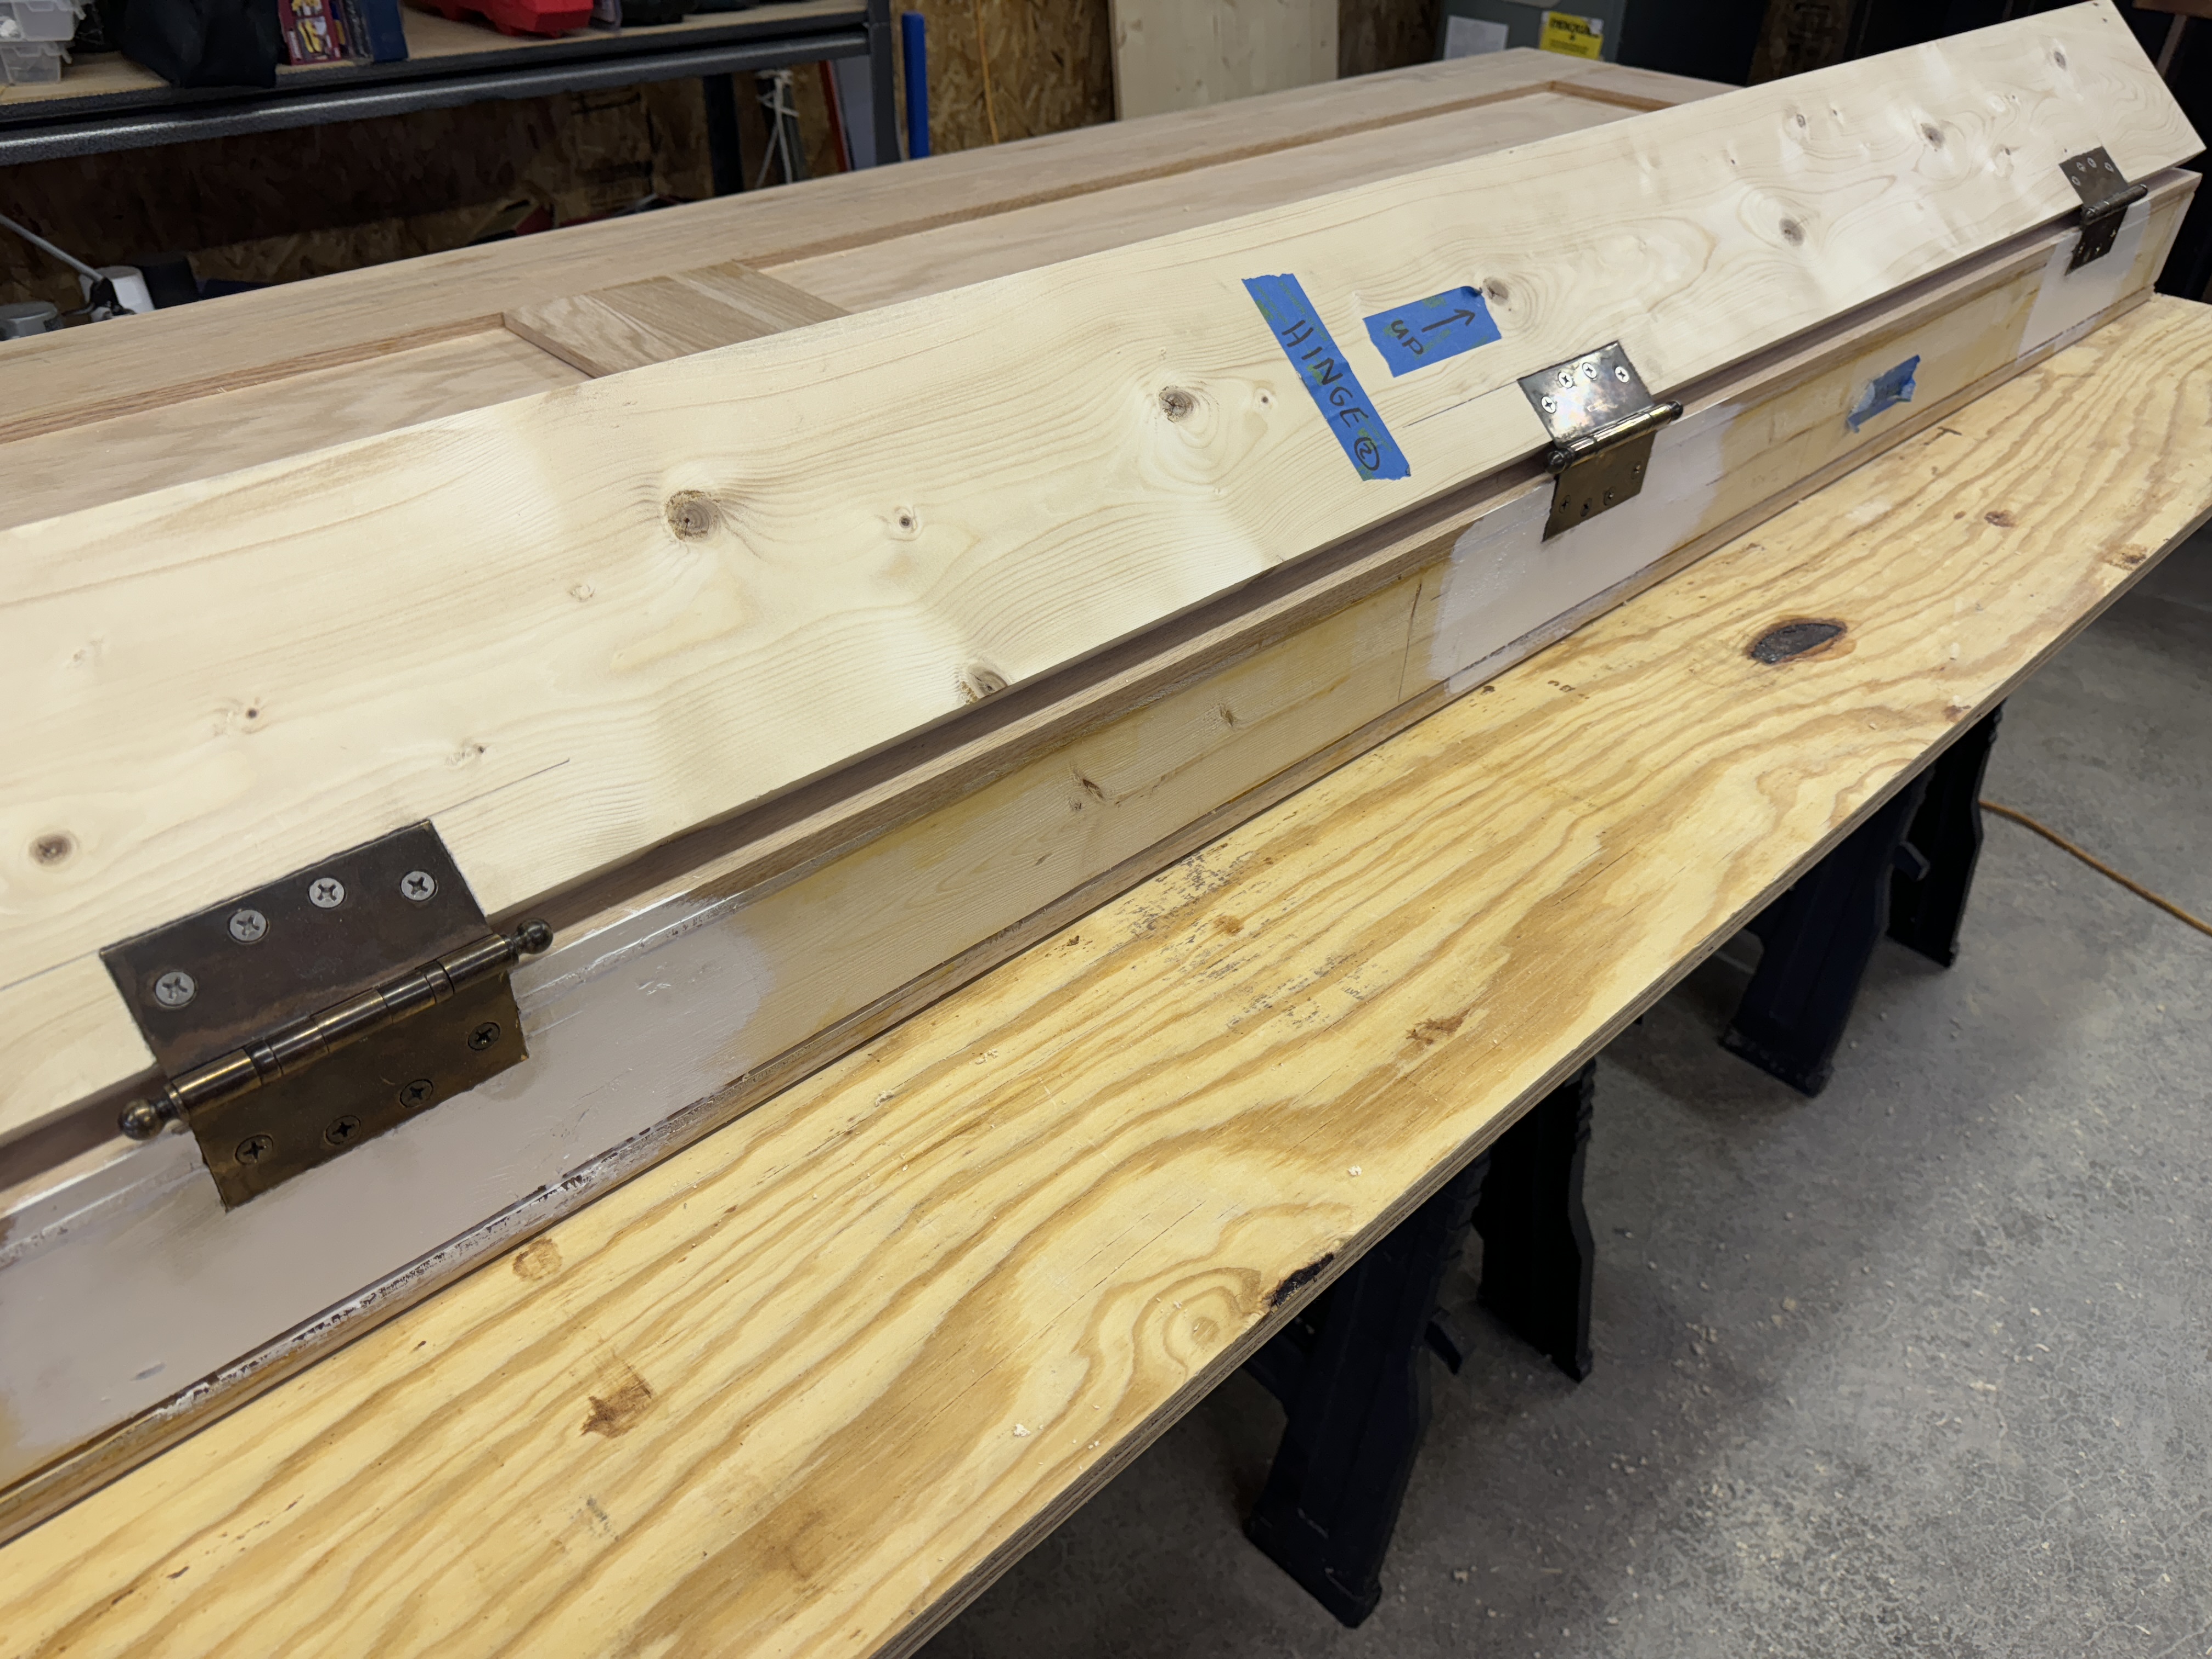
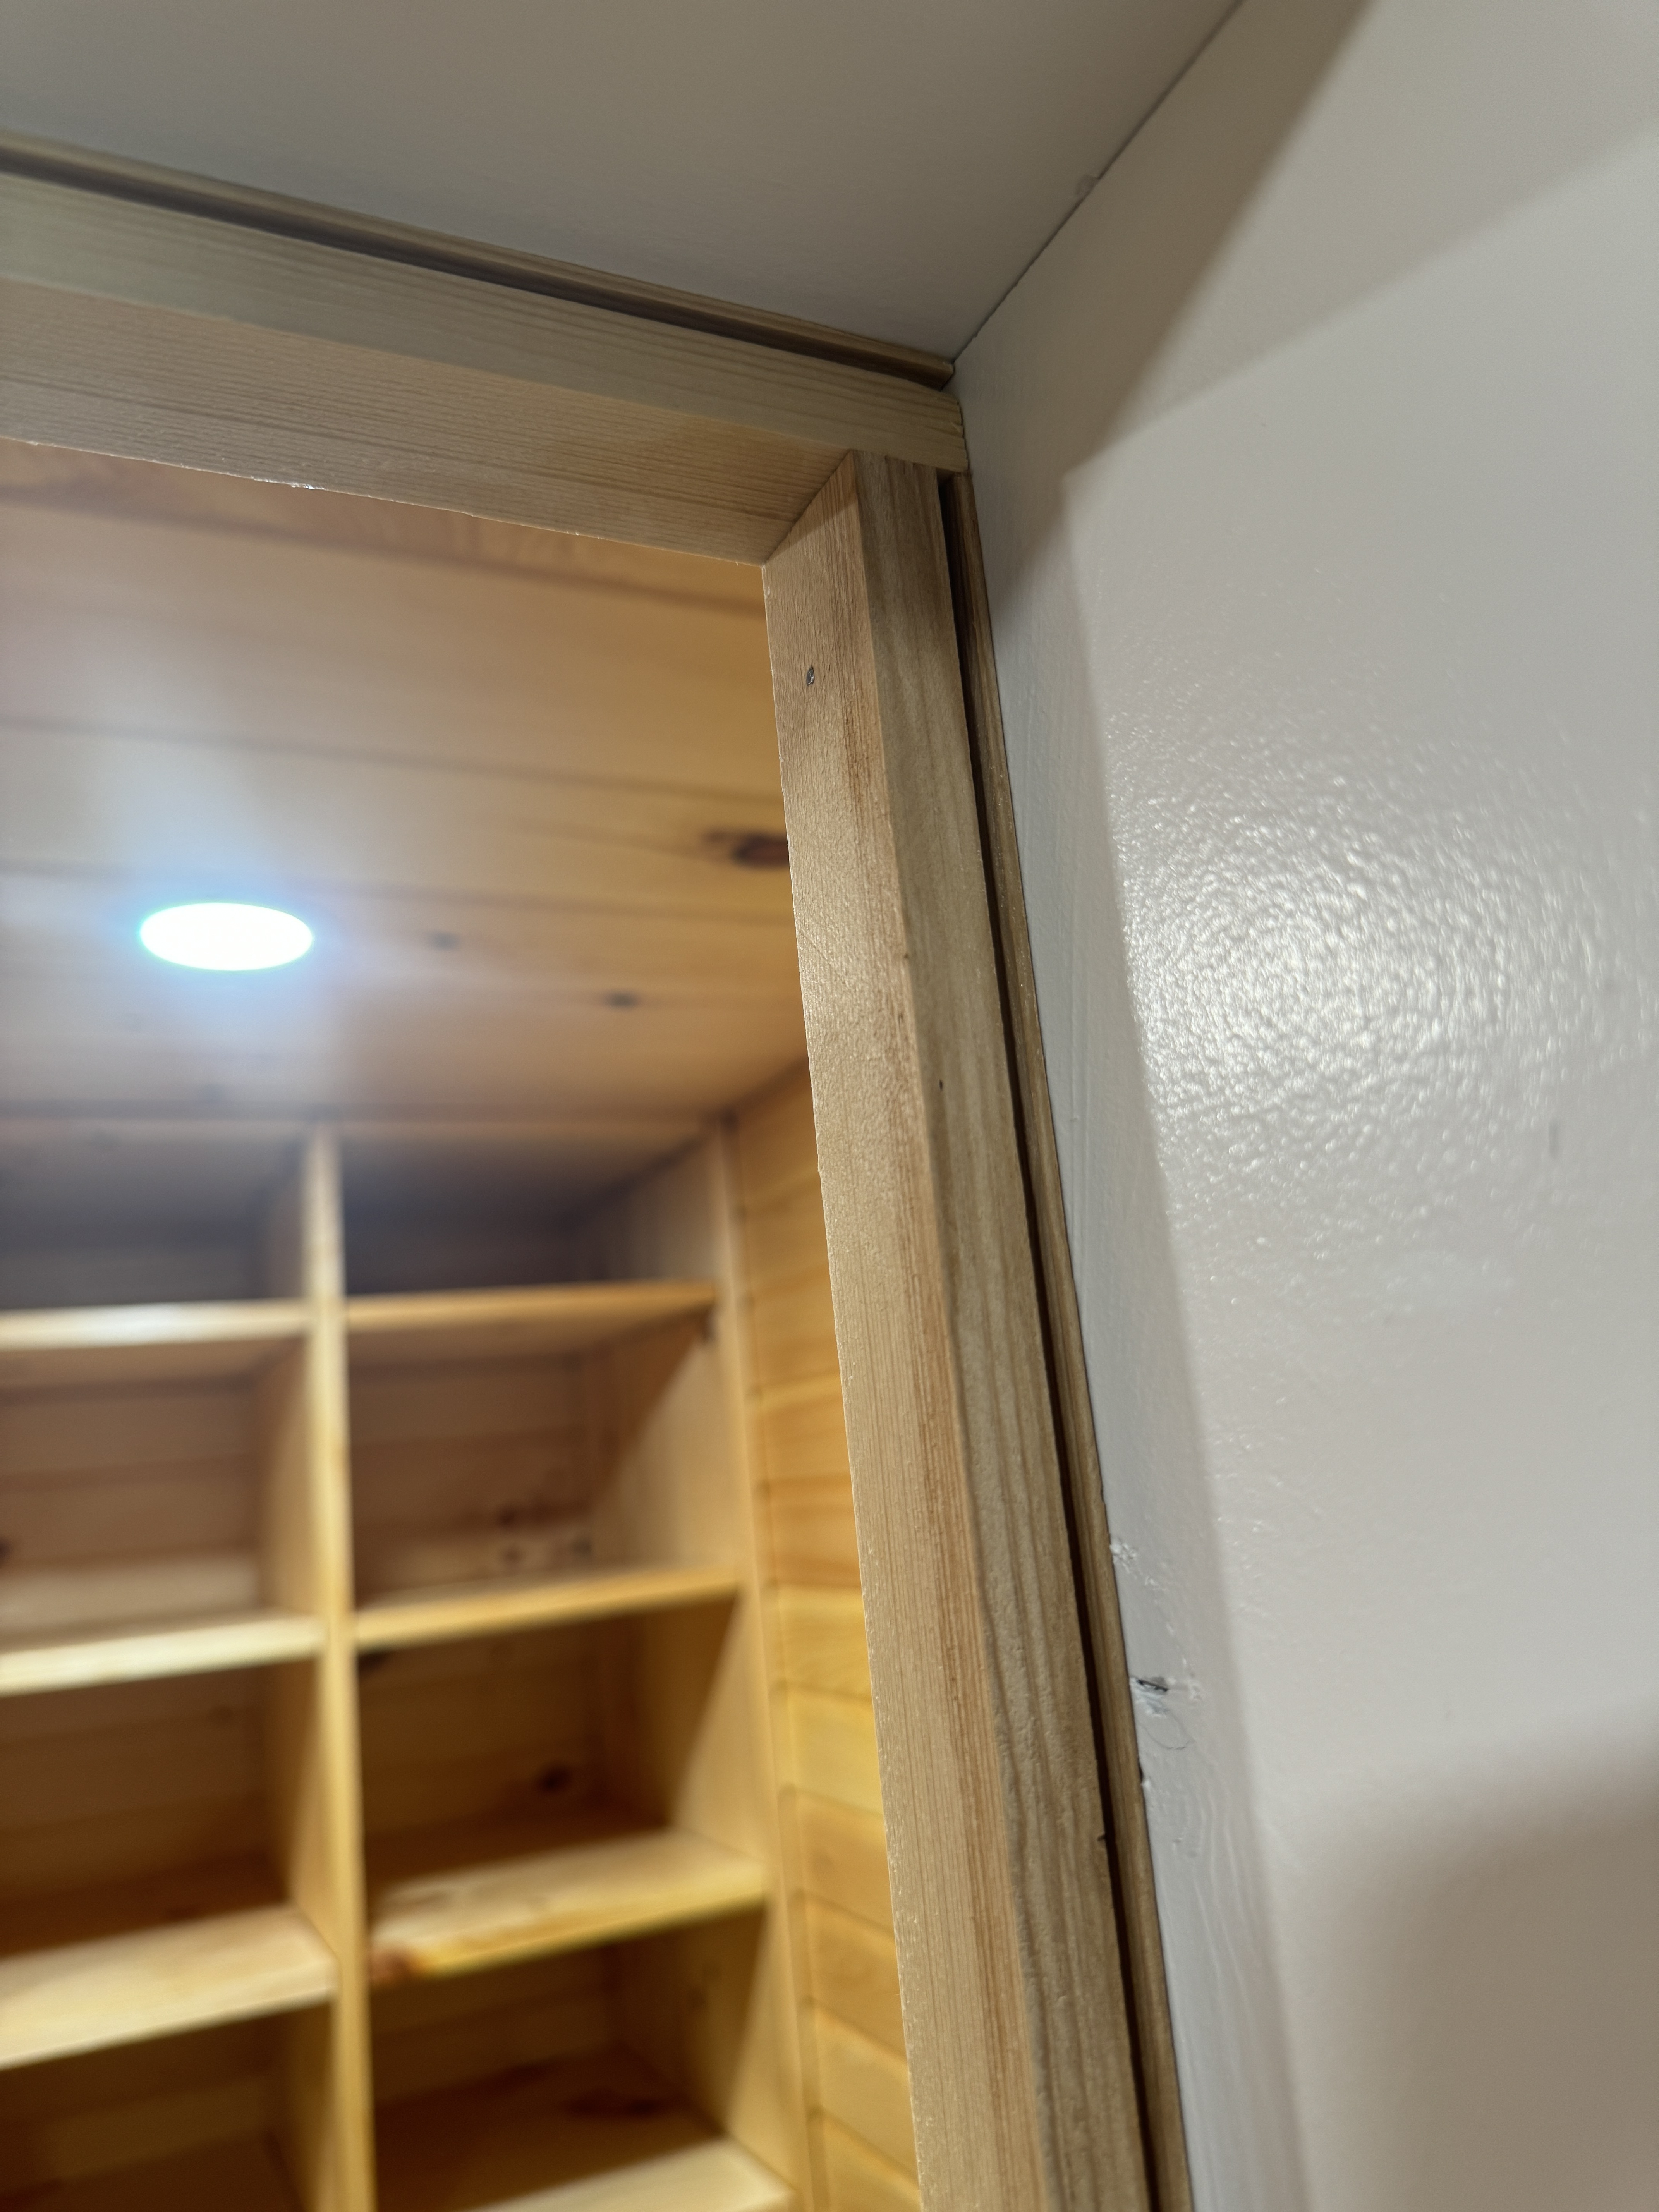
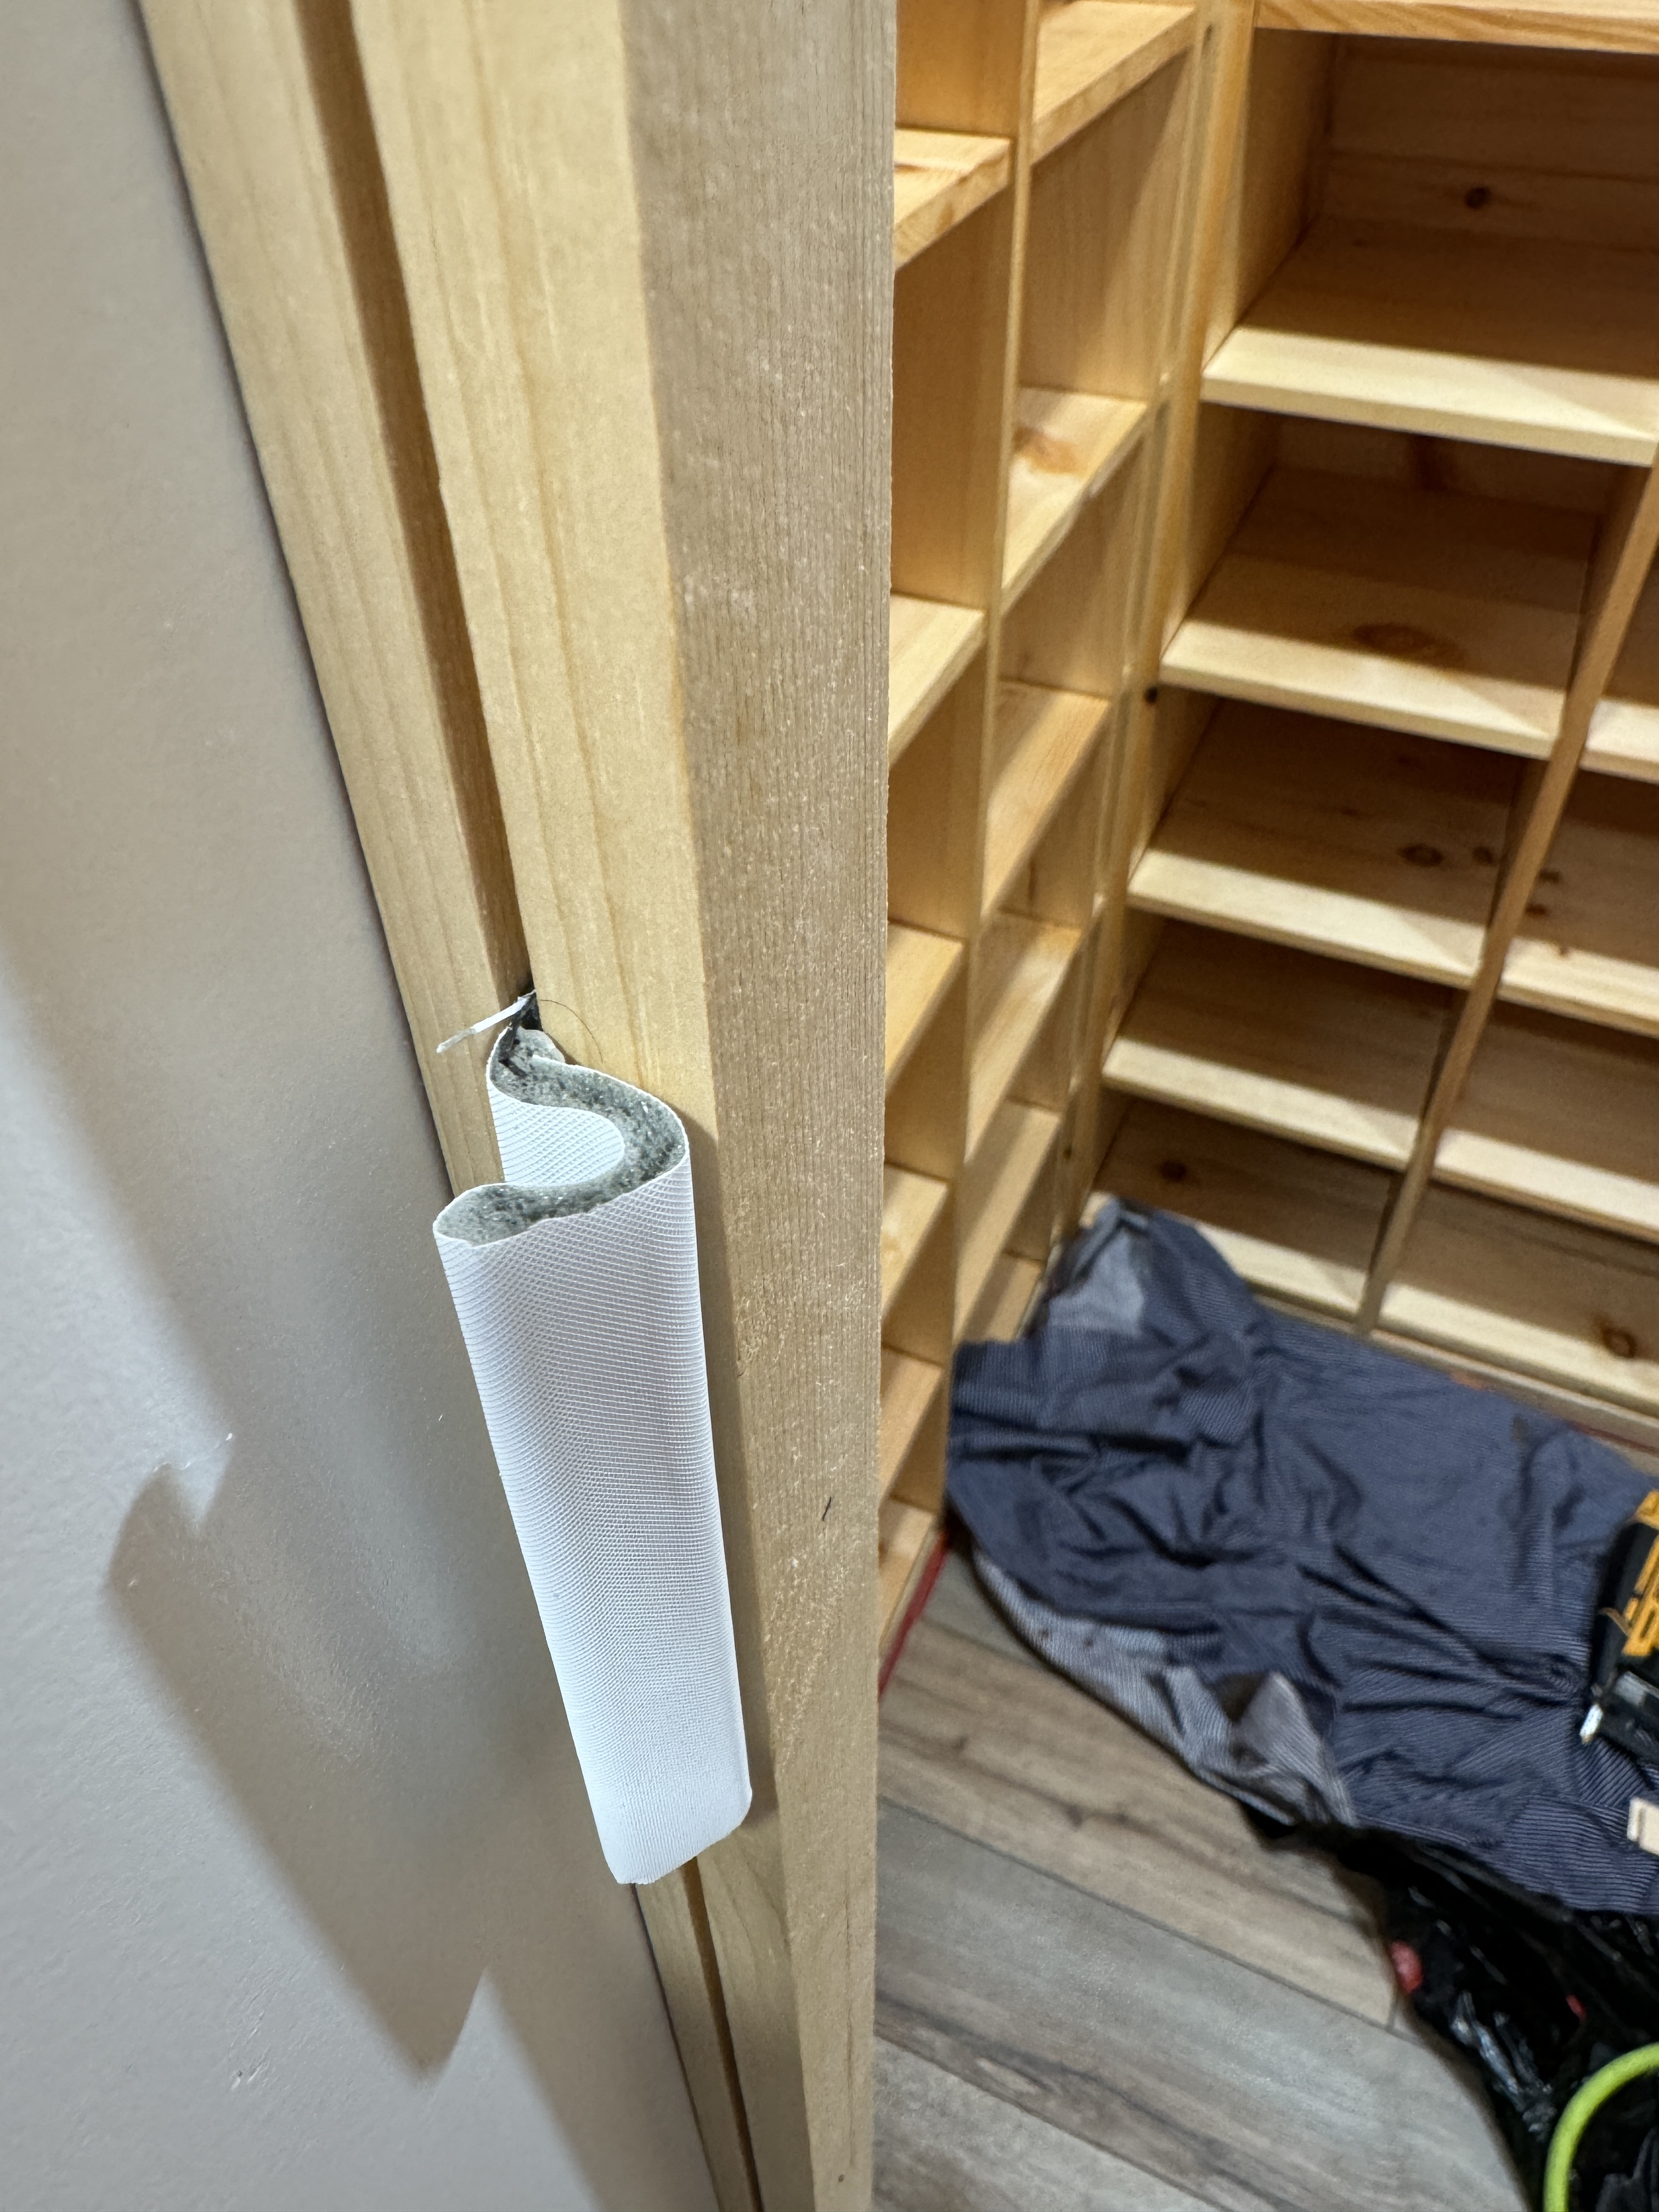
This weekend’s project was building door stops for the cellar door and installing them on the jamb. I ripped each stop from a 2x4 and then cut a kerf to accommodate weatherstripping. I couldn’t use standard moulding for this because the latch side of the 5-inch-thick door is beveled so that it can clear the jamb. That bevel makes it narrower on the inside and necessitated a 1 inch thick stop on that side so that there is enough overlap to install weatherstripping. Next time I’ll give it a lick of paint.

2 Likes
My two takeaways here are: 1) you’ve got some serious skills and 2) I’m glad I went with a pre-hung exterior door for my cellar!
1 Like
That’s very kind, but I’m afraid you’ve severely overestimated my skill. For example, my process for this weekend was:
- Research what a standard door stop looks like.

- Figure out what changes would be required to accommodate my weirdly thick door.

- Build the door stop.

- Realize I forgot to account for something back in step 2.

- Throw away all the work I did in step 3.

- Finally build it right and install it.

I have learned a LOT during this project, and had a lot of fun too, but I’m looking forward to being able to fill it up with wine and getting a different kind of enjoyment out of it.
6 Likes
Great Job @Charles_Perry ! Just think with your new skills, you be able to build out all of the rest of the doors in your home!
1 Like

520 square feet - one bedroom - one bath - plus a giant cellar. Is this the ultimate Berserkers bachelor pad?
9 Likes
Root cellar originally, 2/3 of an acre with a couple of additional outbuildings.
-Al
Would be inconvenient to have to dig through lots of snow to grab a couple bottles of wine though in the winter.
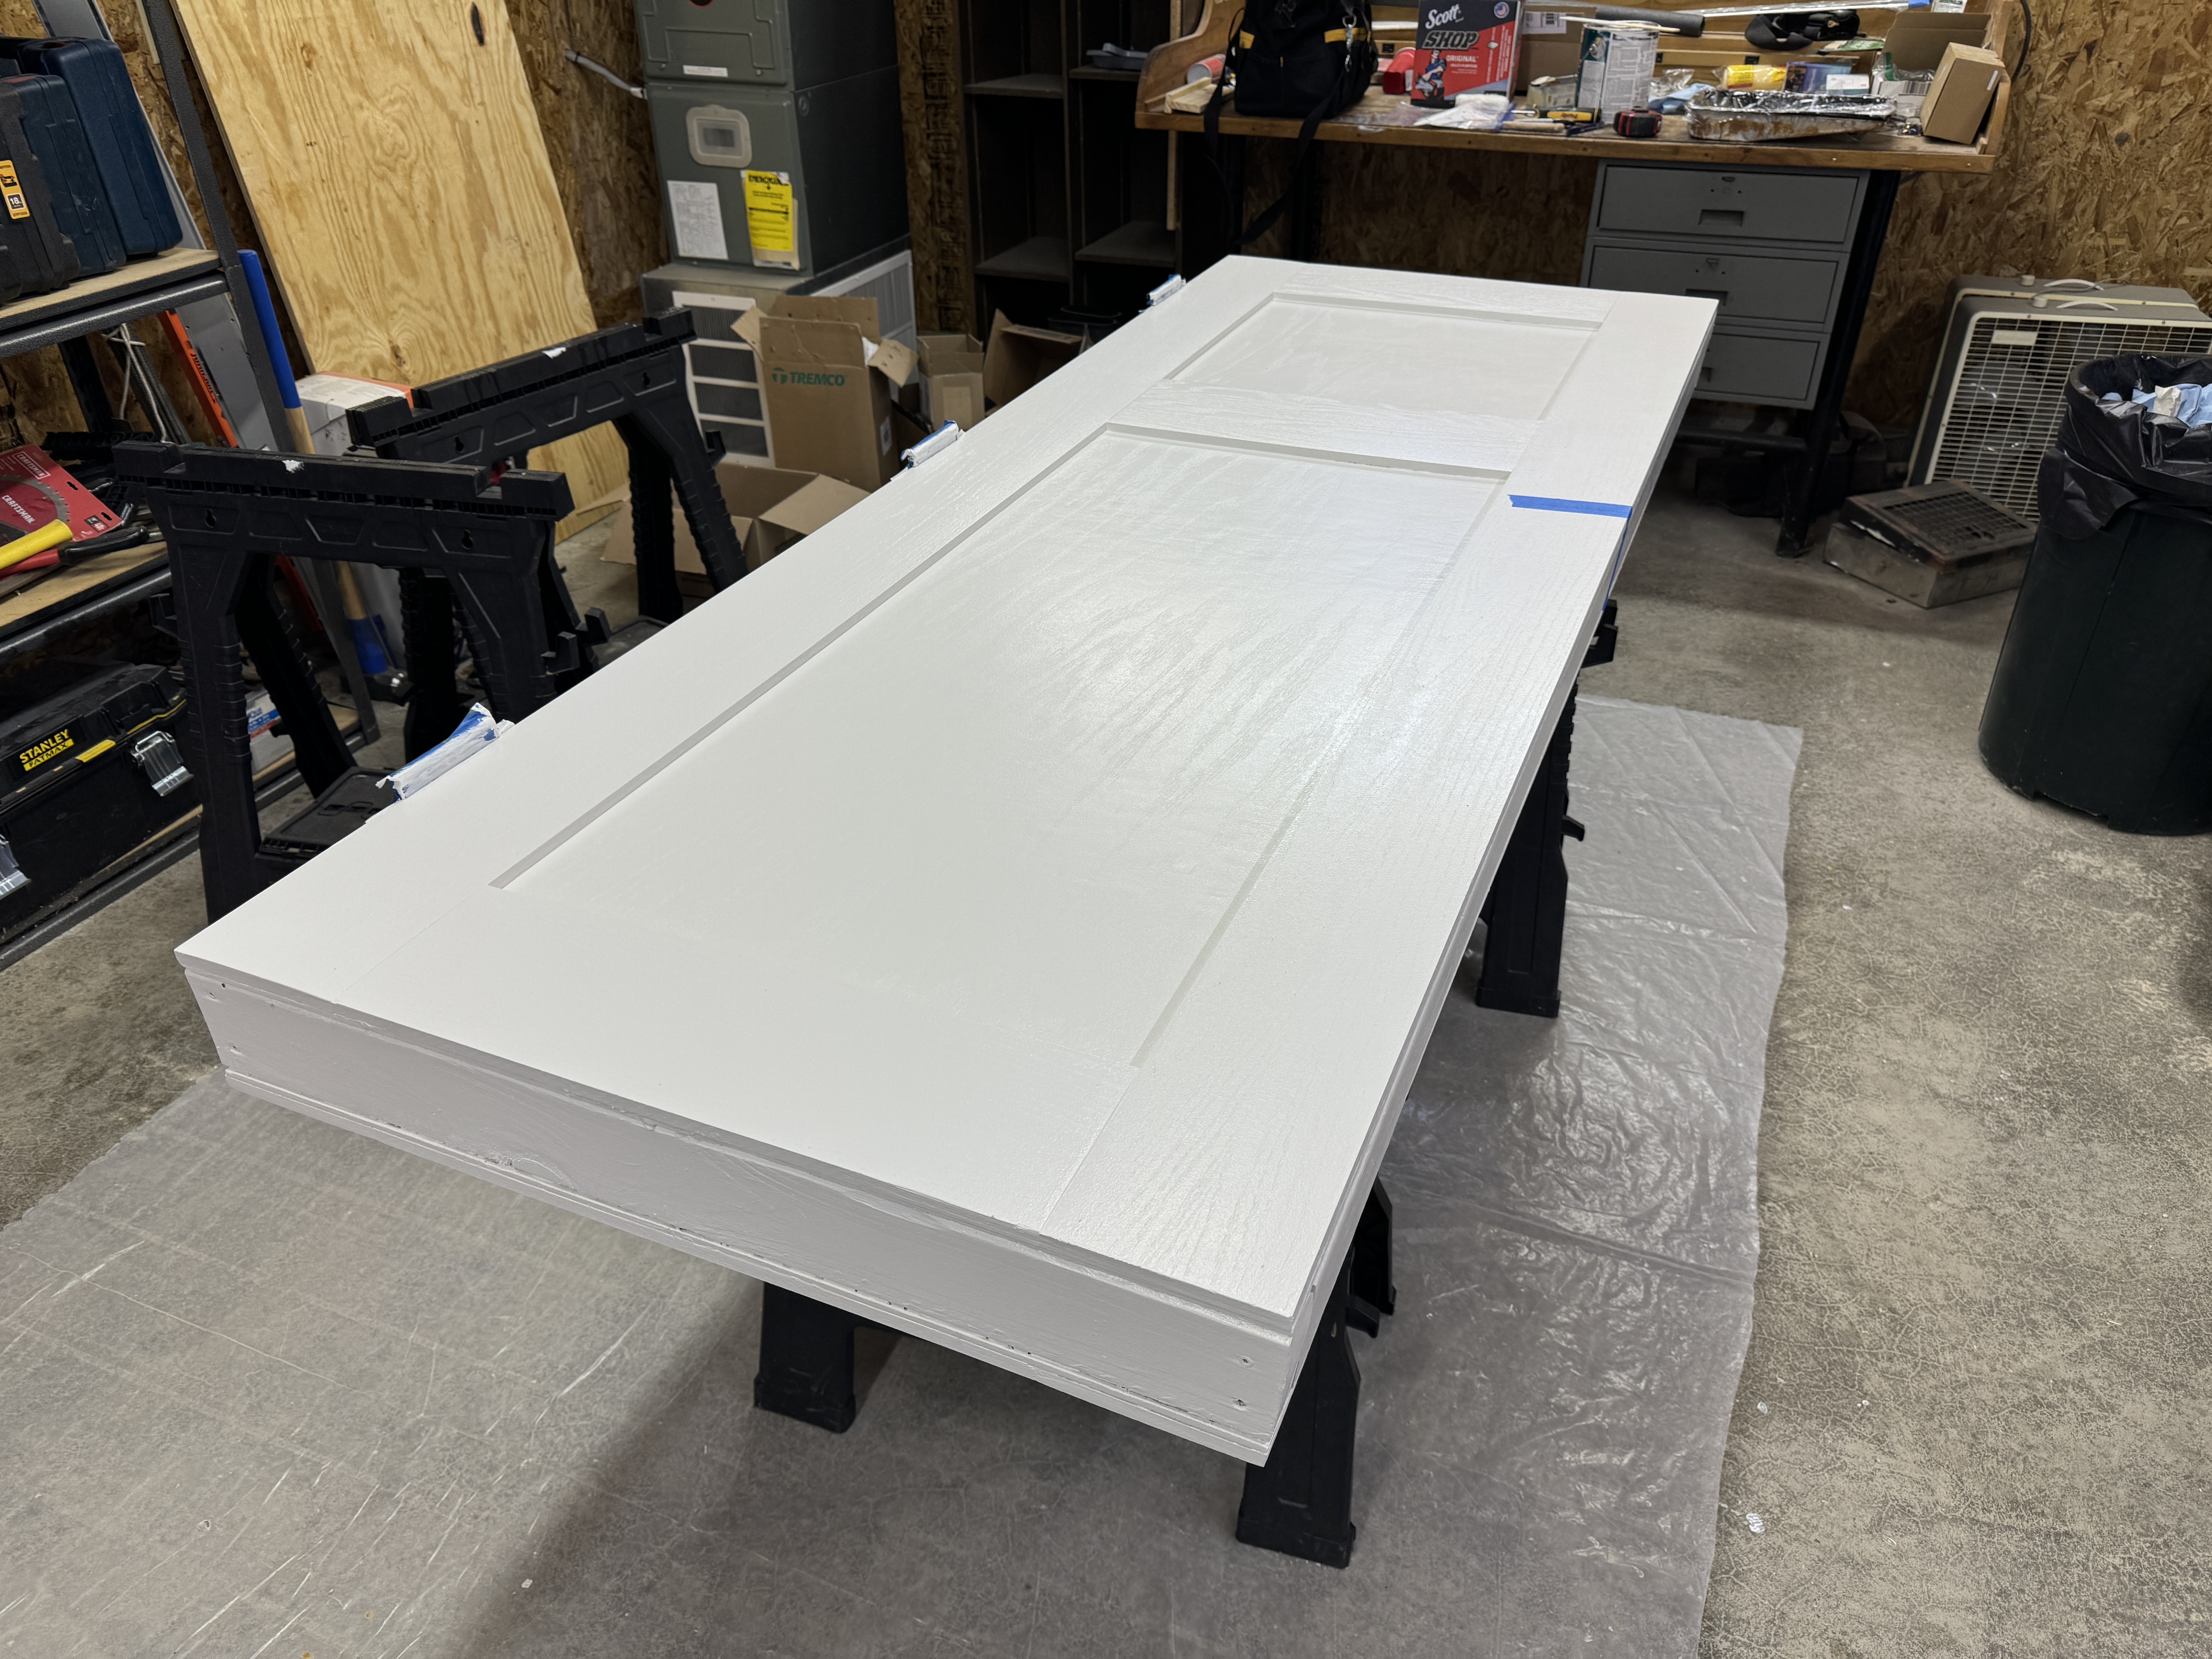
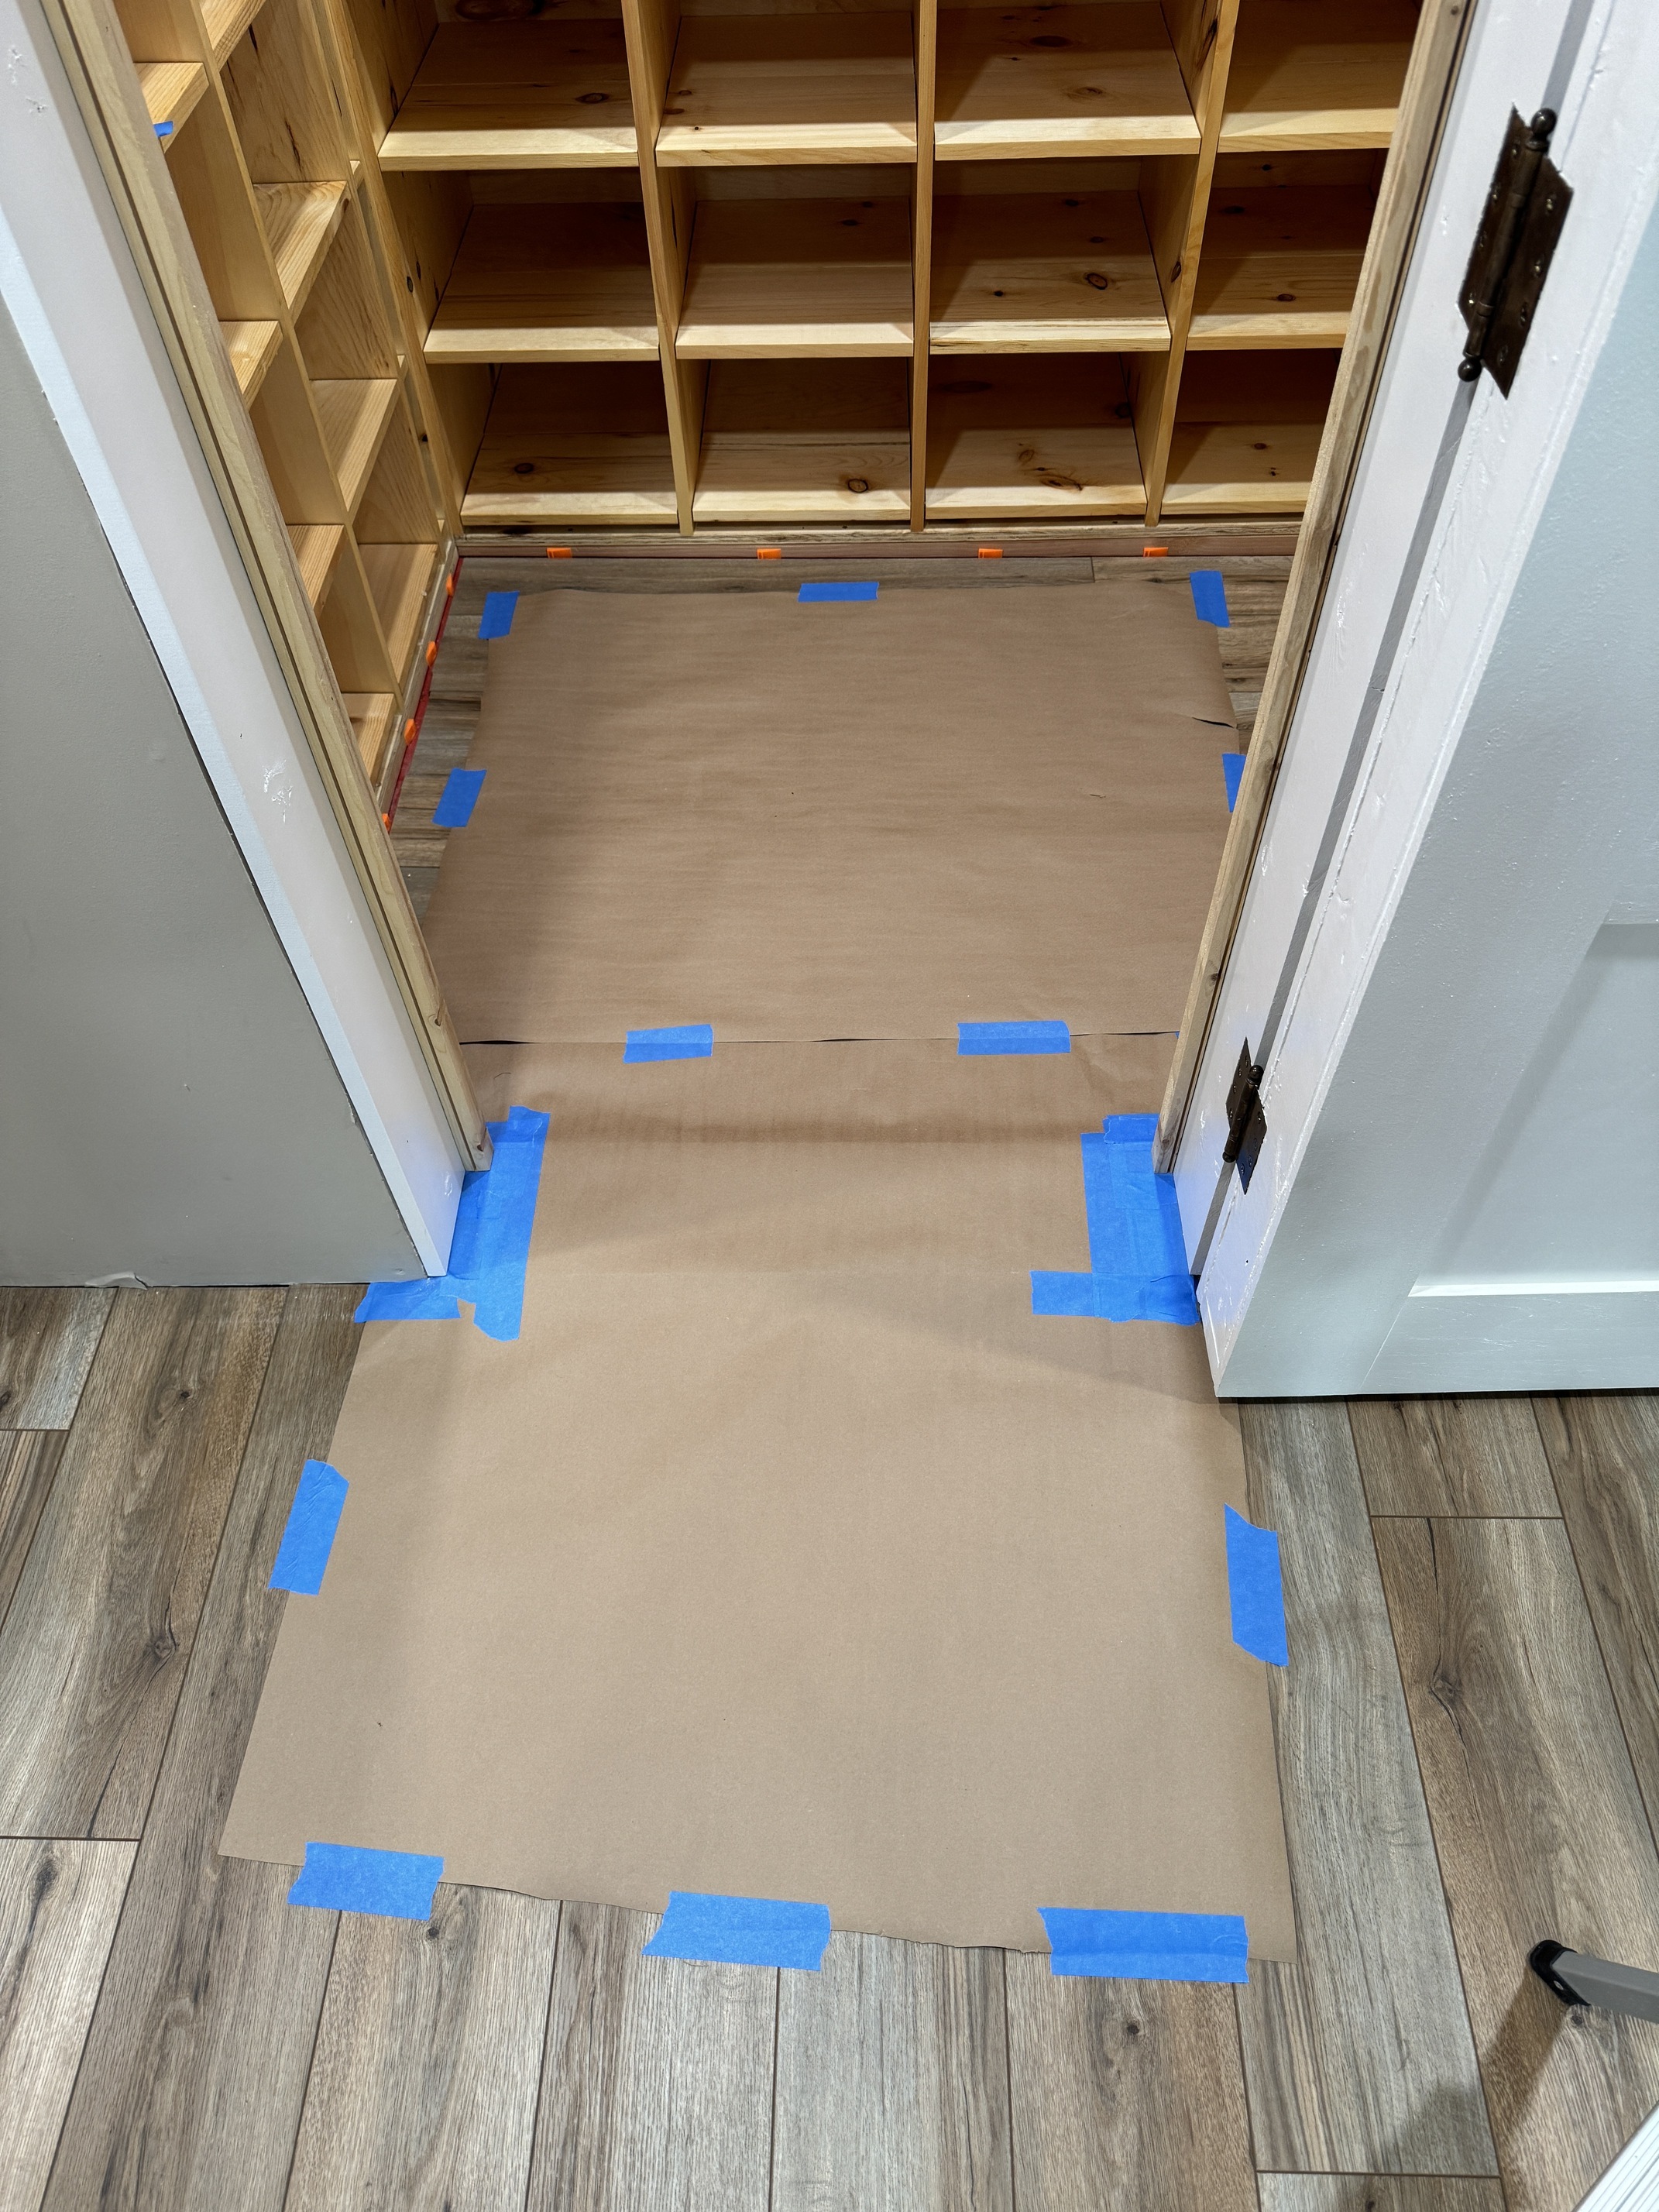
I worked on the wine cellar a little more this weekend, with the goal being to finish the door and seal everything up in preparation for the cooling unit.
First up, I caulked and painted the door stops attached to the jamb, and then installed weatherstripping.
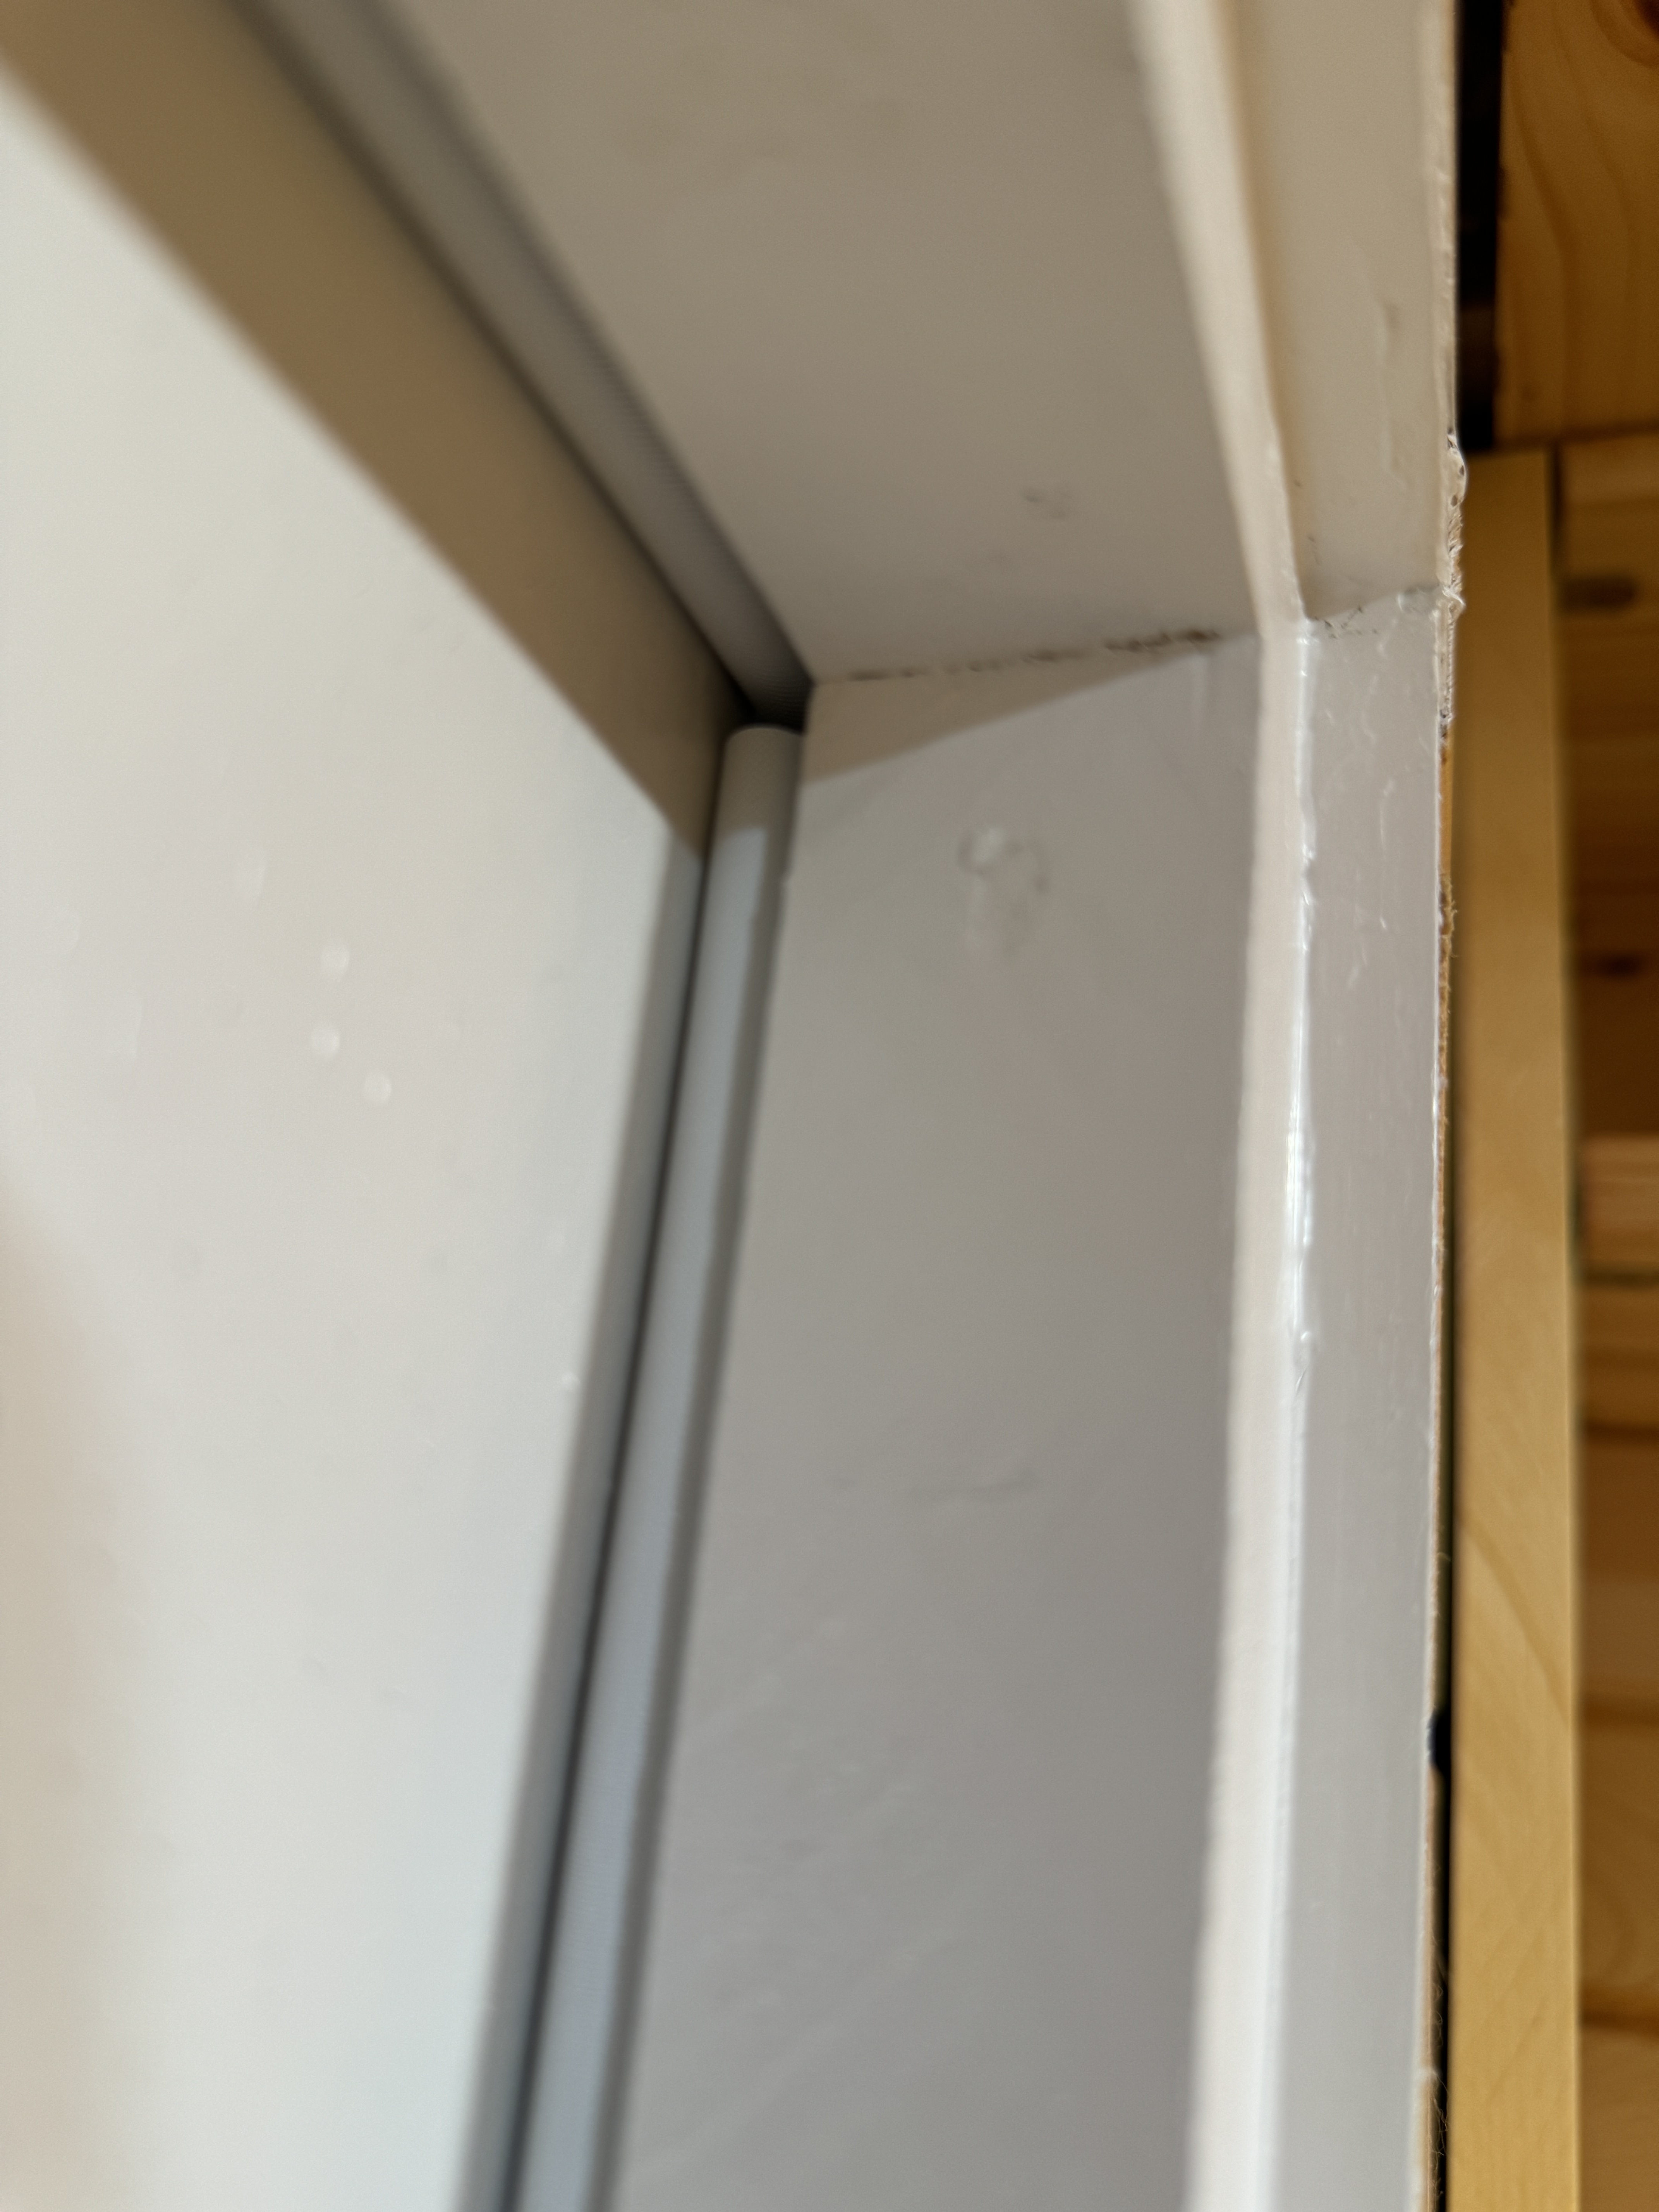
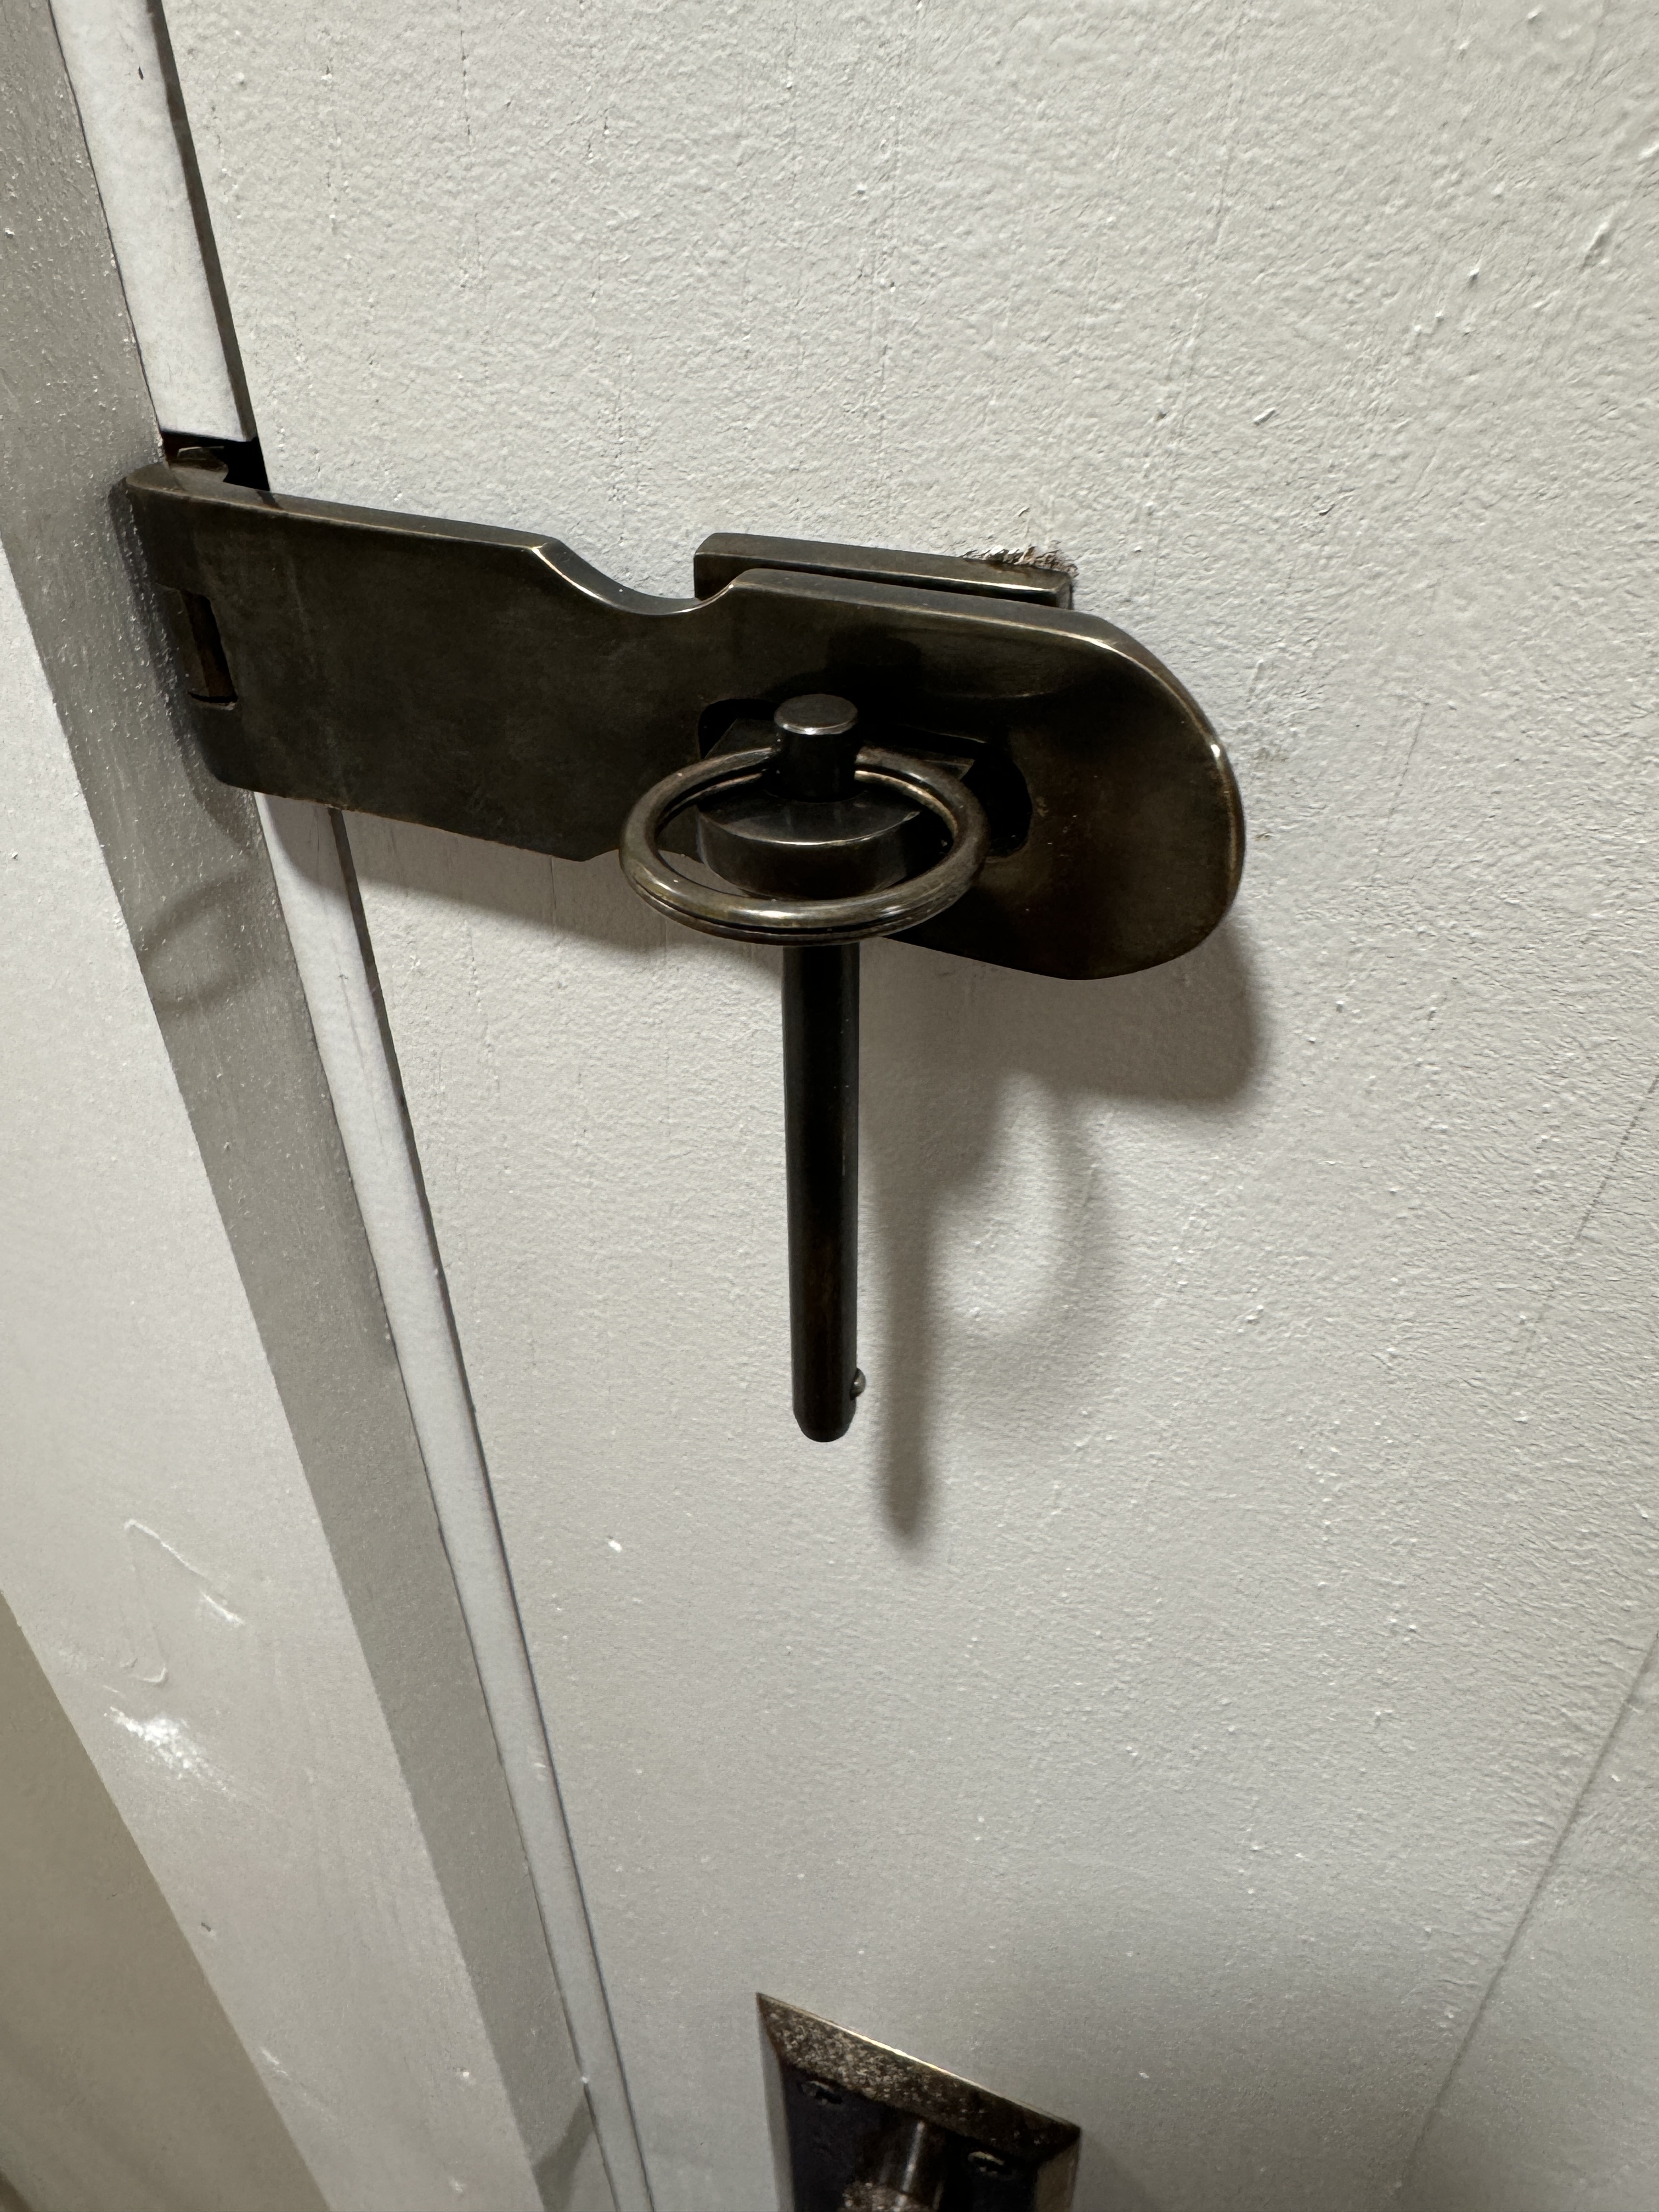
Then I painted and installed the door casing and added some locking hardware to the door. I don’t really need it to lock right now, but my niece and nephew are getting older and will probably start bringing friends up, so I decided to install a hasp just in case.
I’ve still got to touch up some paint and install baseboards and trim inside the cellar, but the end is in sight!


16 Likes
I am so impressed with guys and gals who know how to construct these things themselves. ![]()
3 Likes
Ditto!!
![]()
1 Like
Looking good Charles! It looks like you’re almost there.
1 Like
Love the hardware on the door.
Good luck getting to the finish line. Enjoy seeing the progress.
1 Like
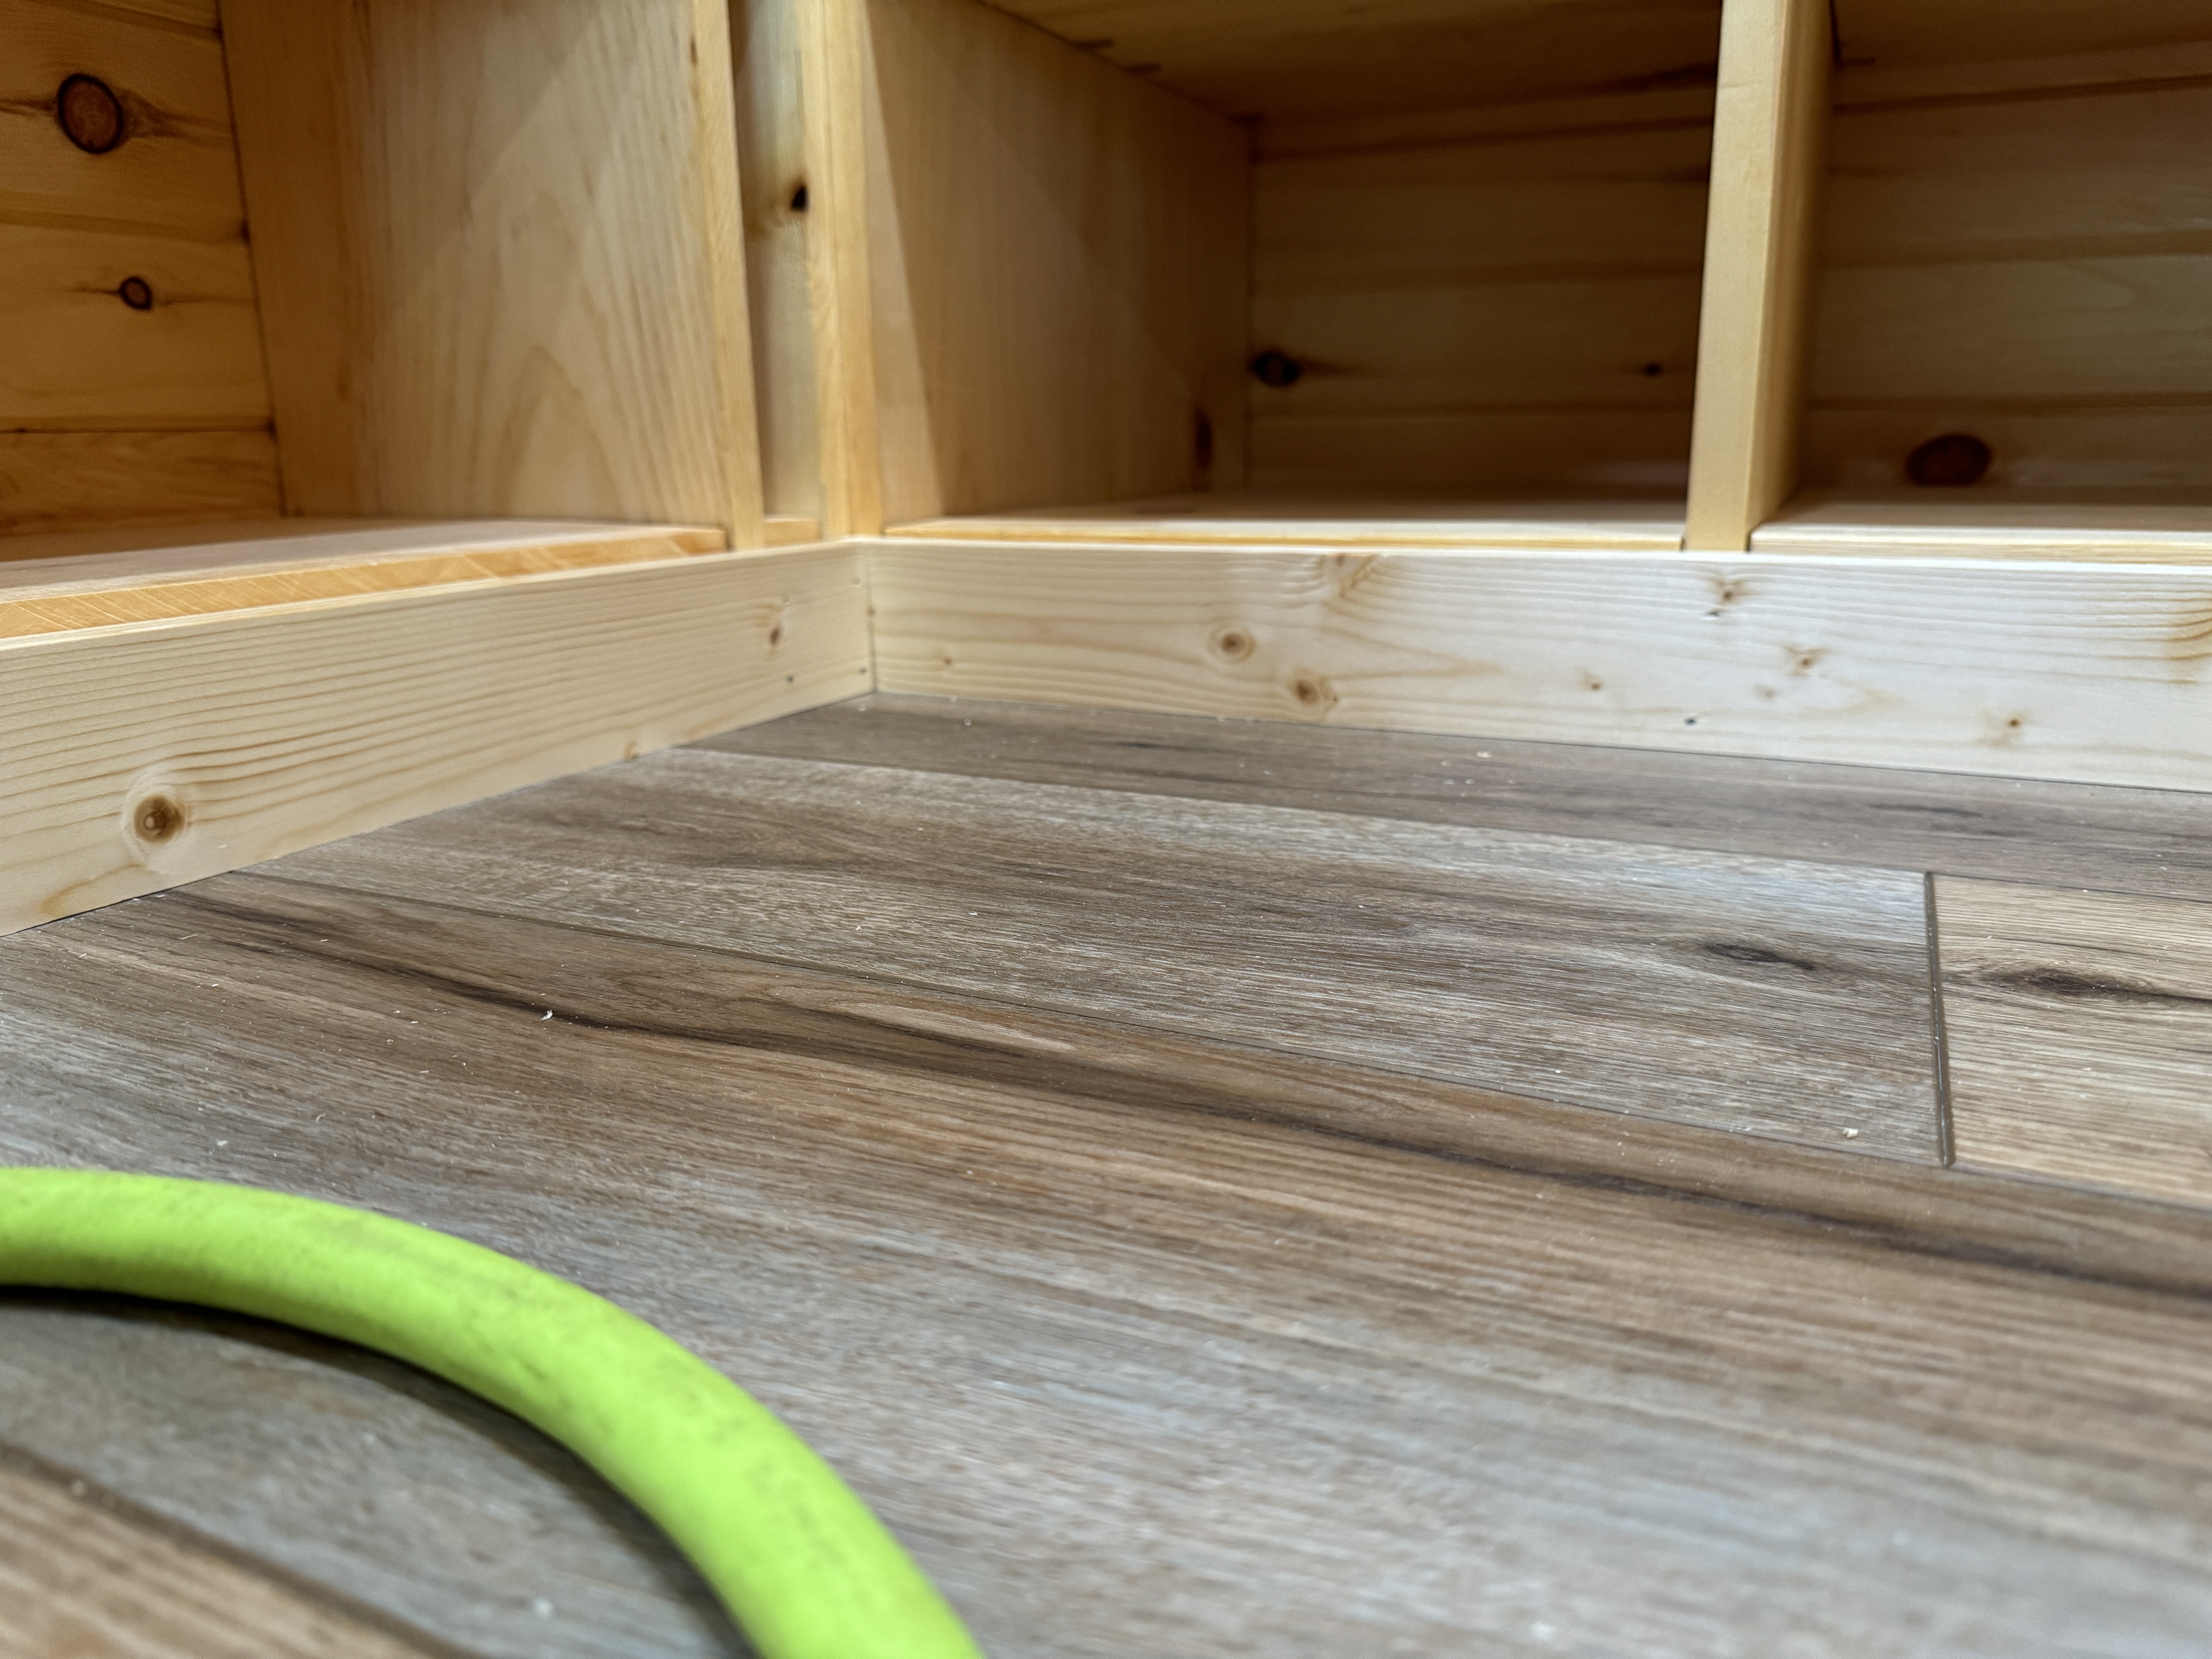
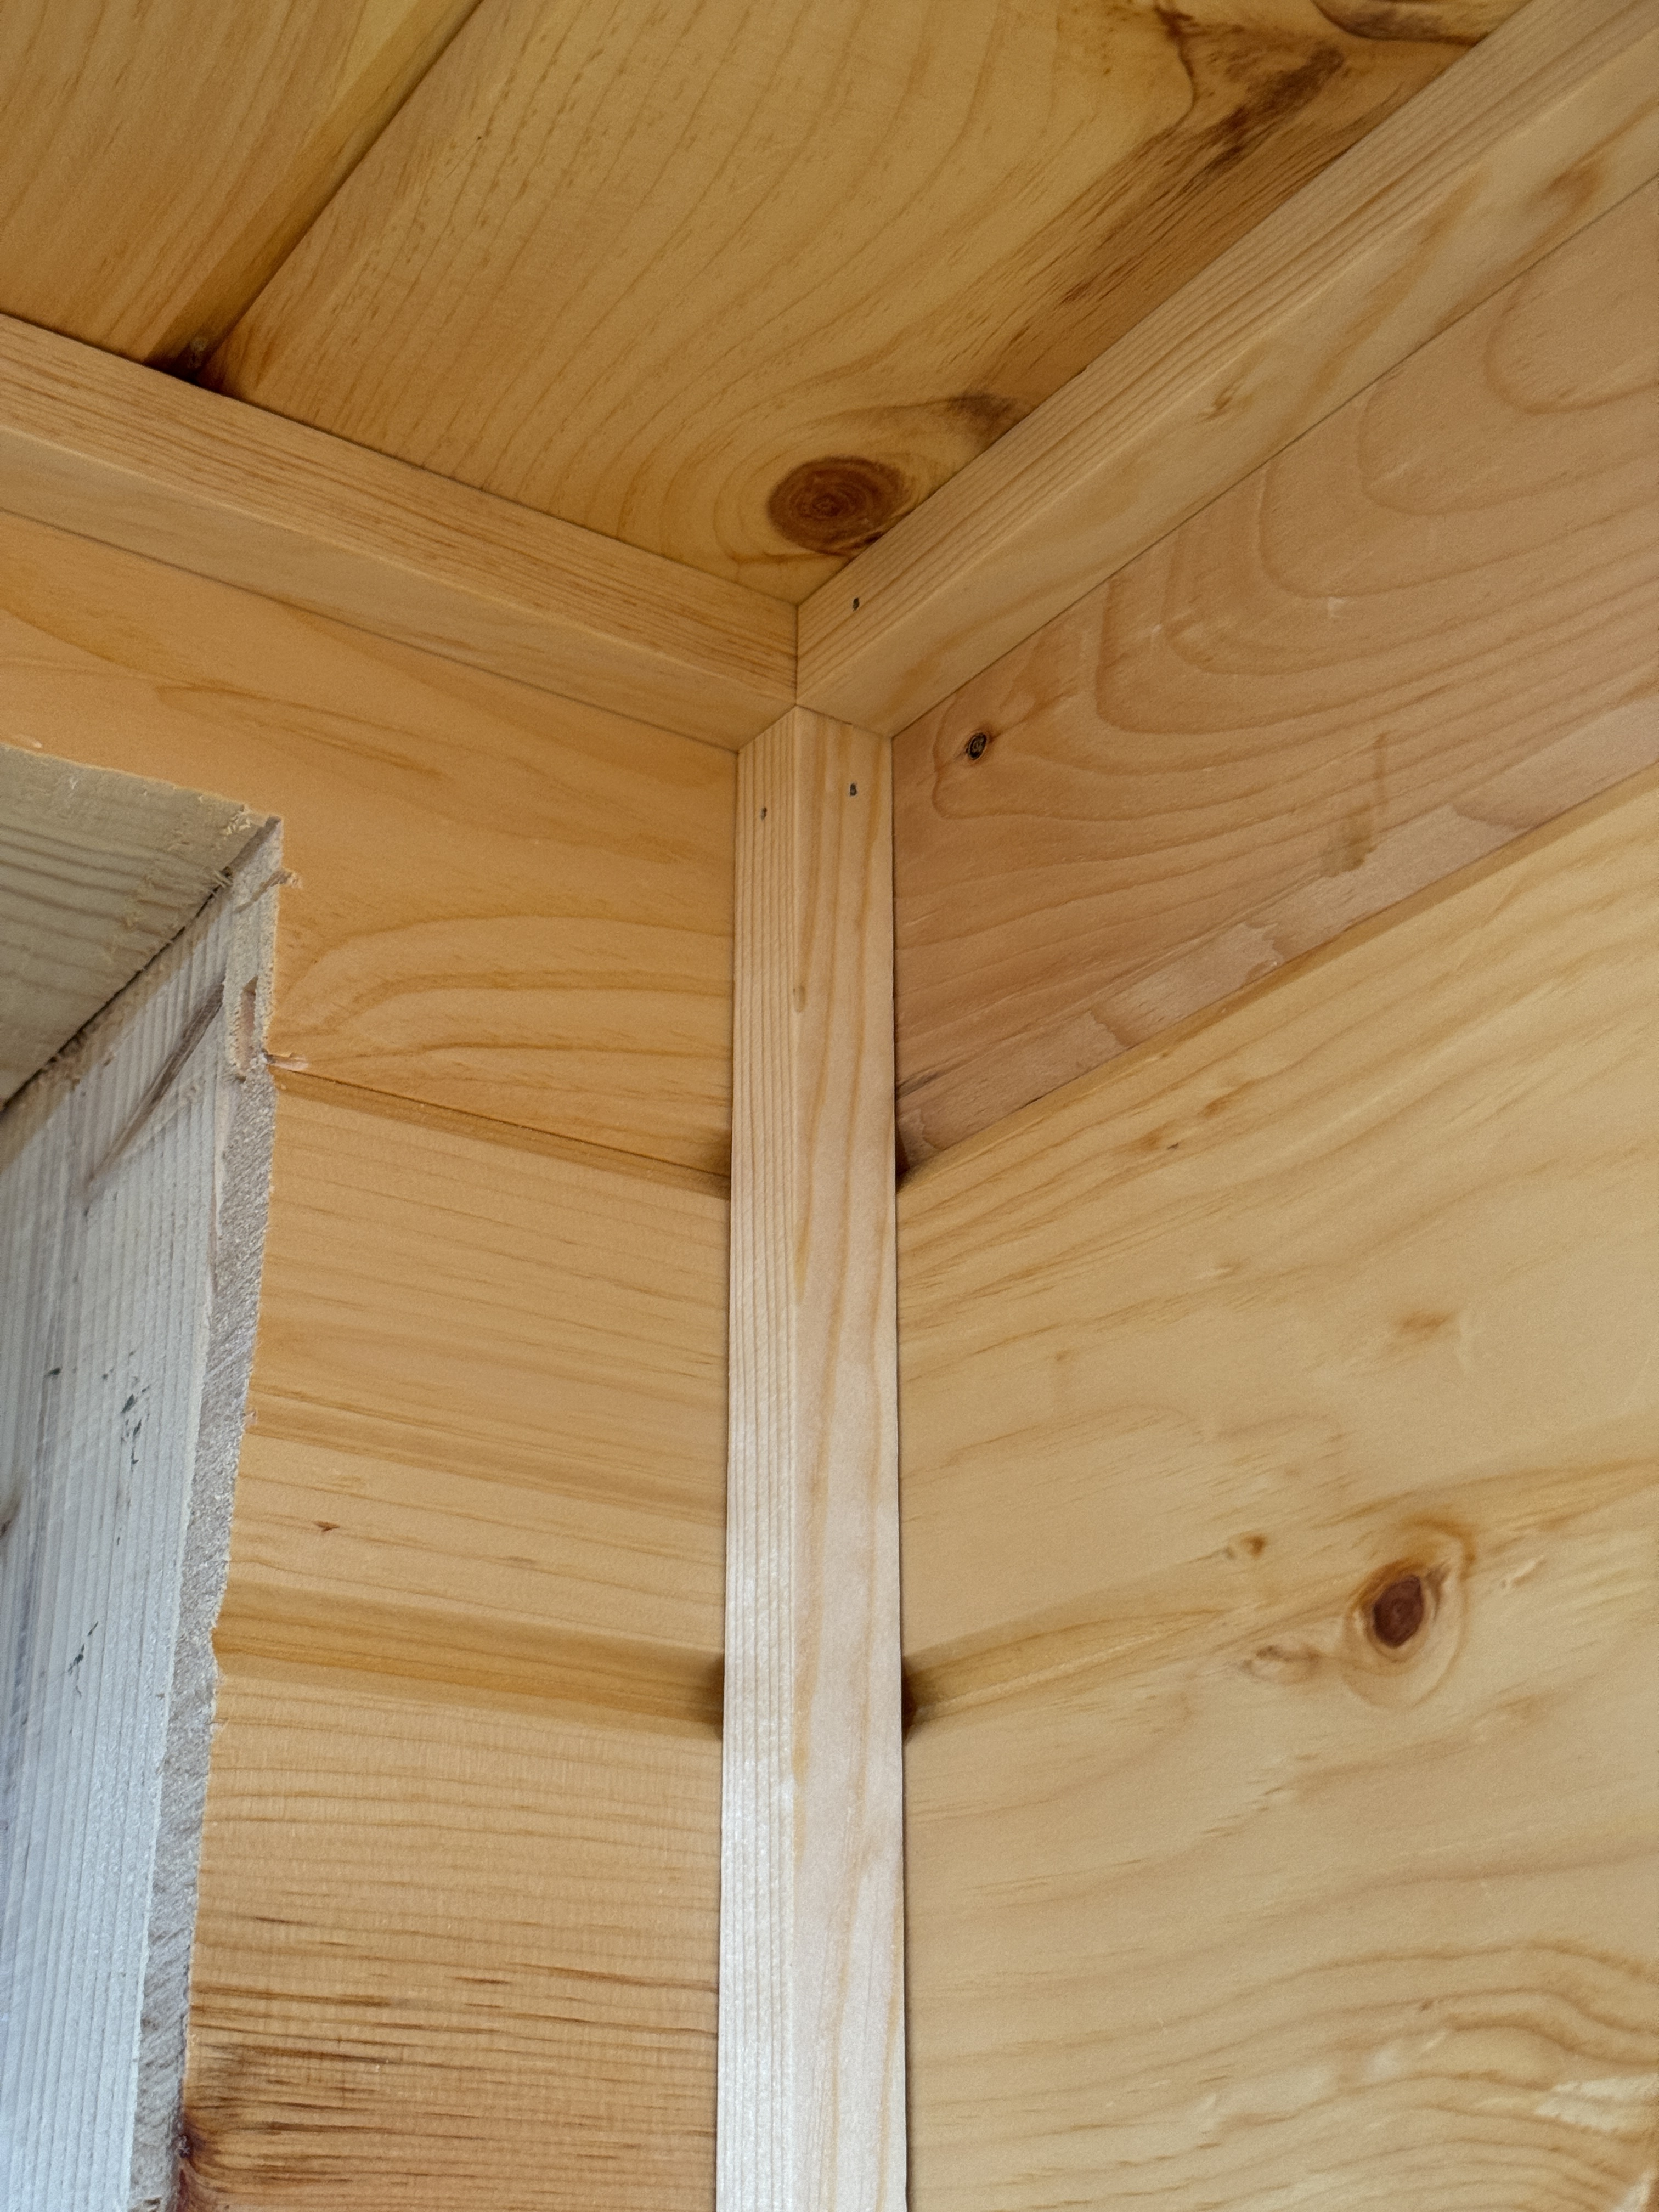
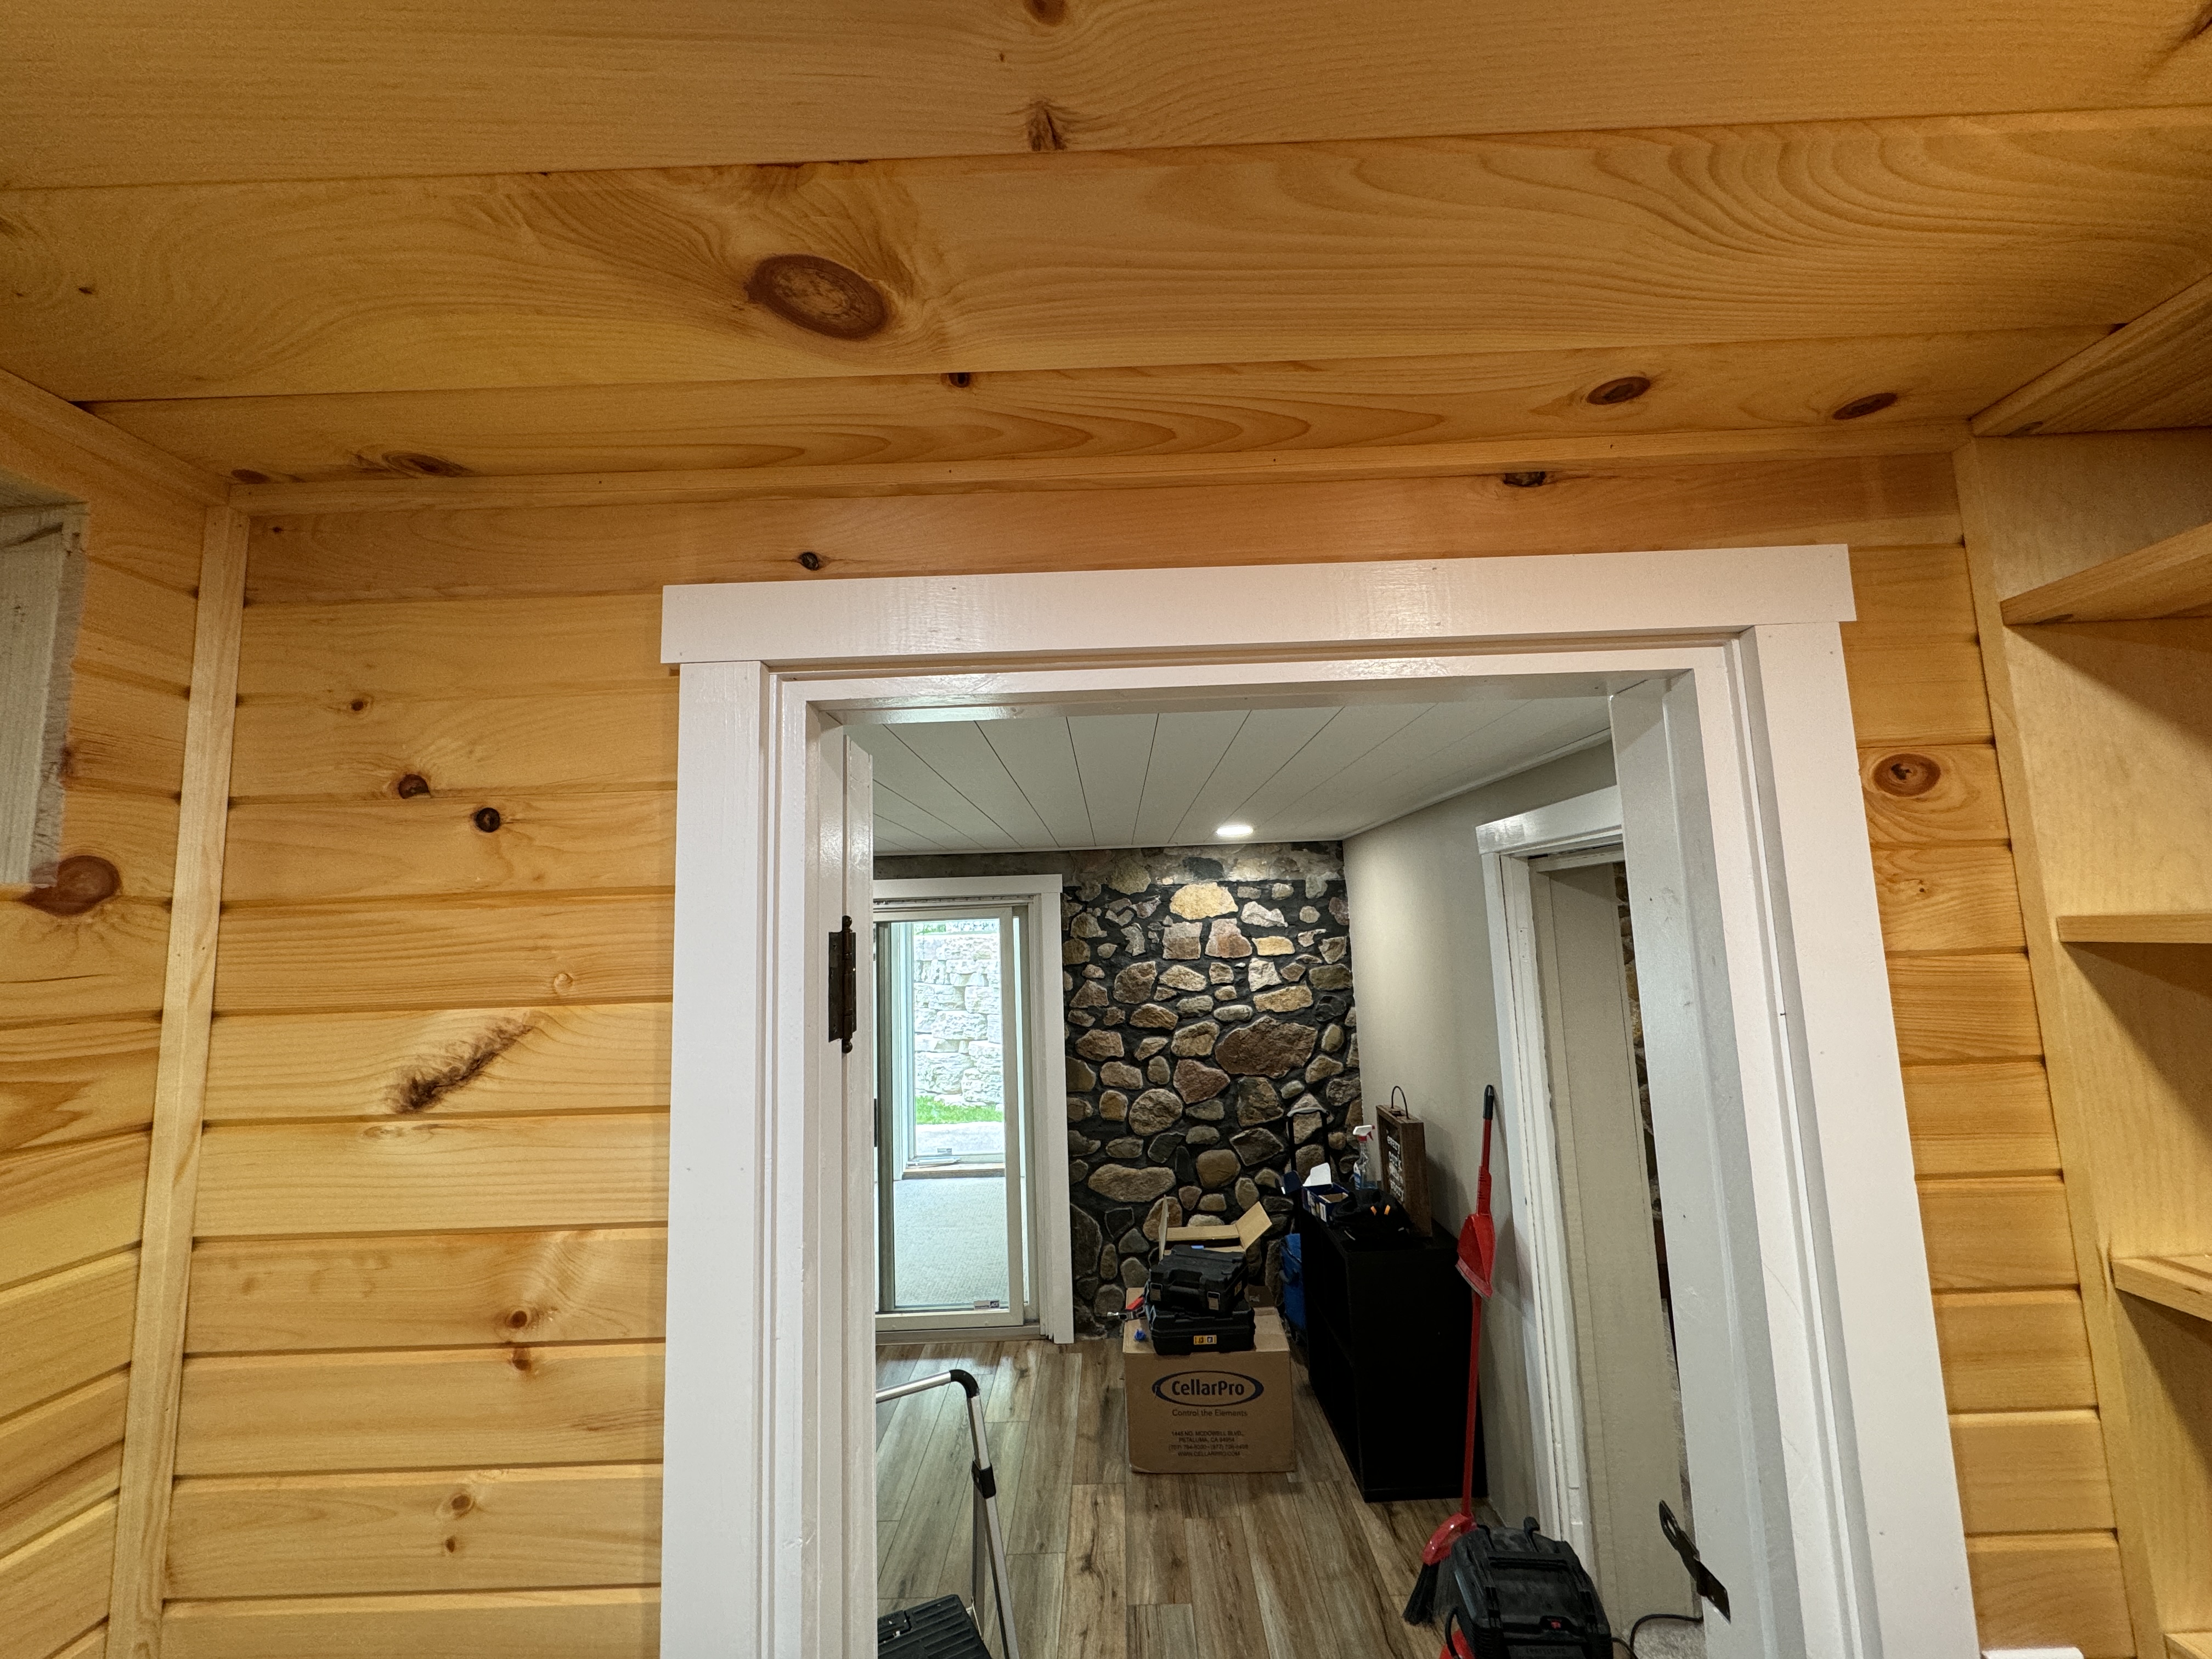
Wine cellar update: Last weekend I worked on some of the finishing touches and installed baseboards and wall/ceiling trim.
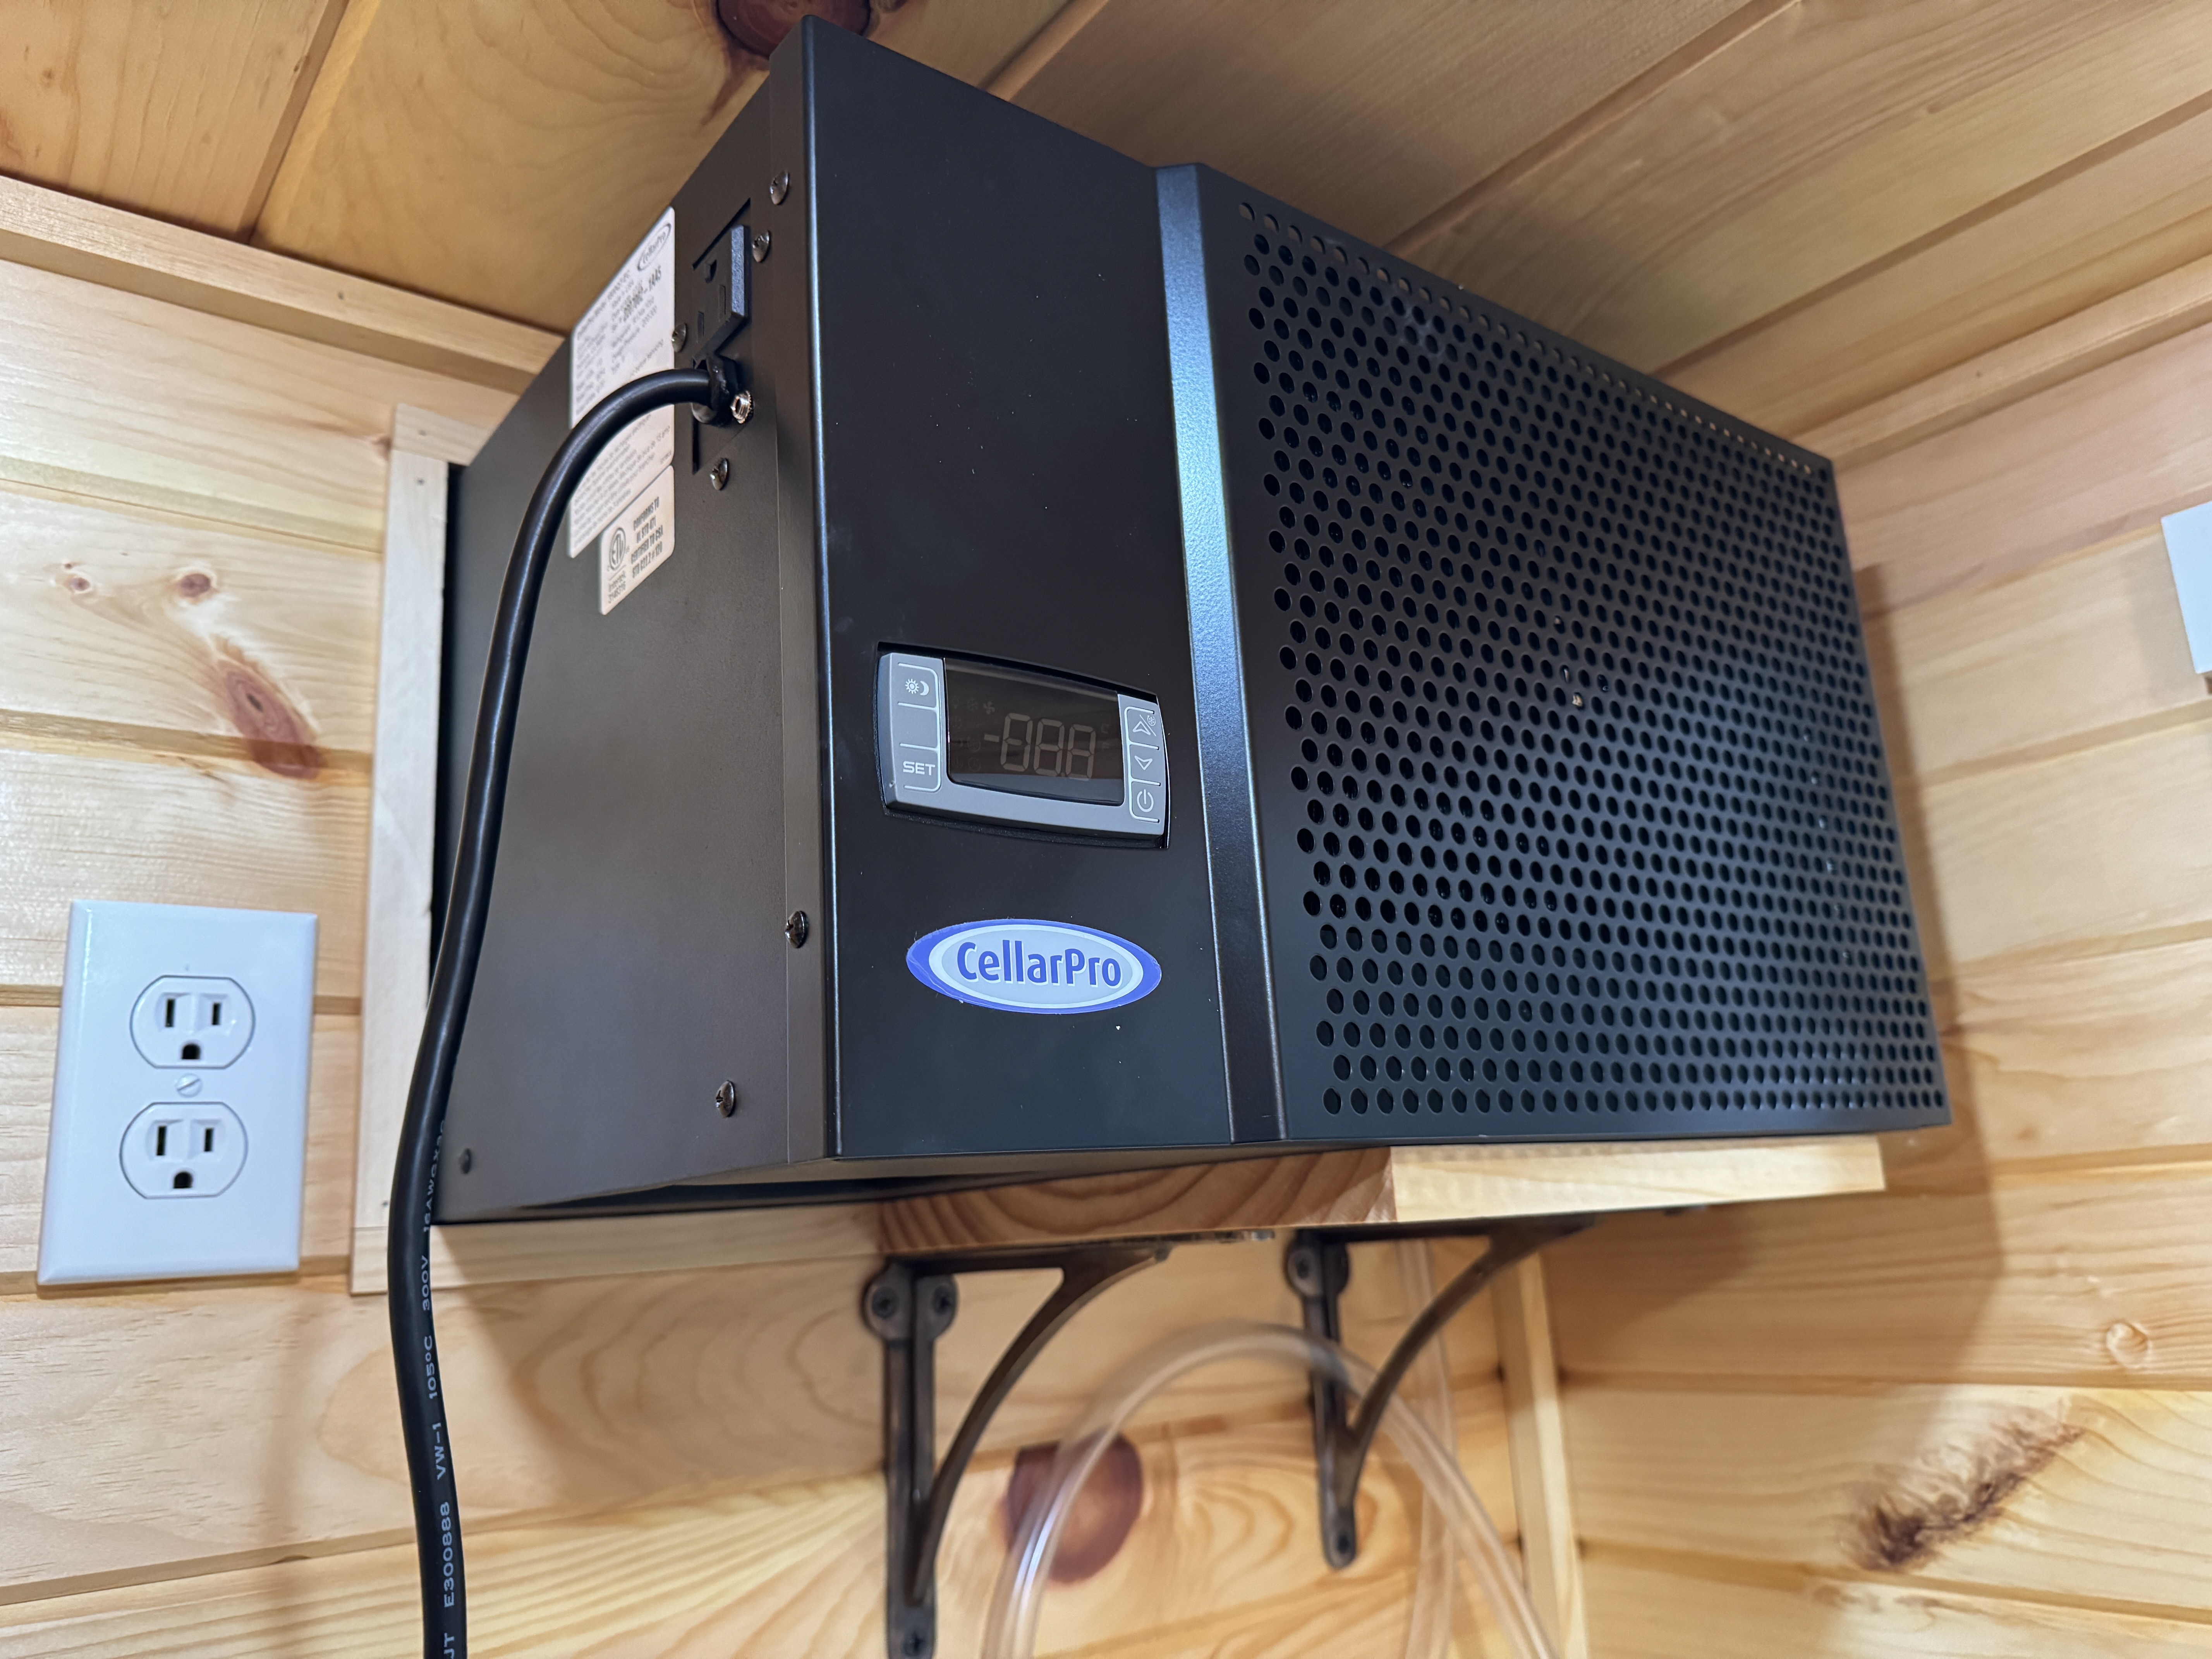
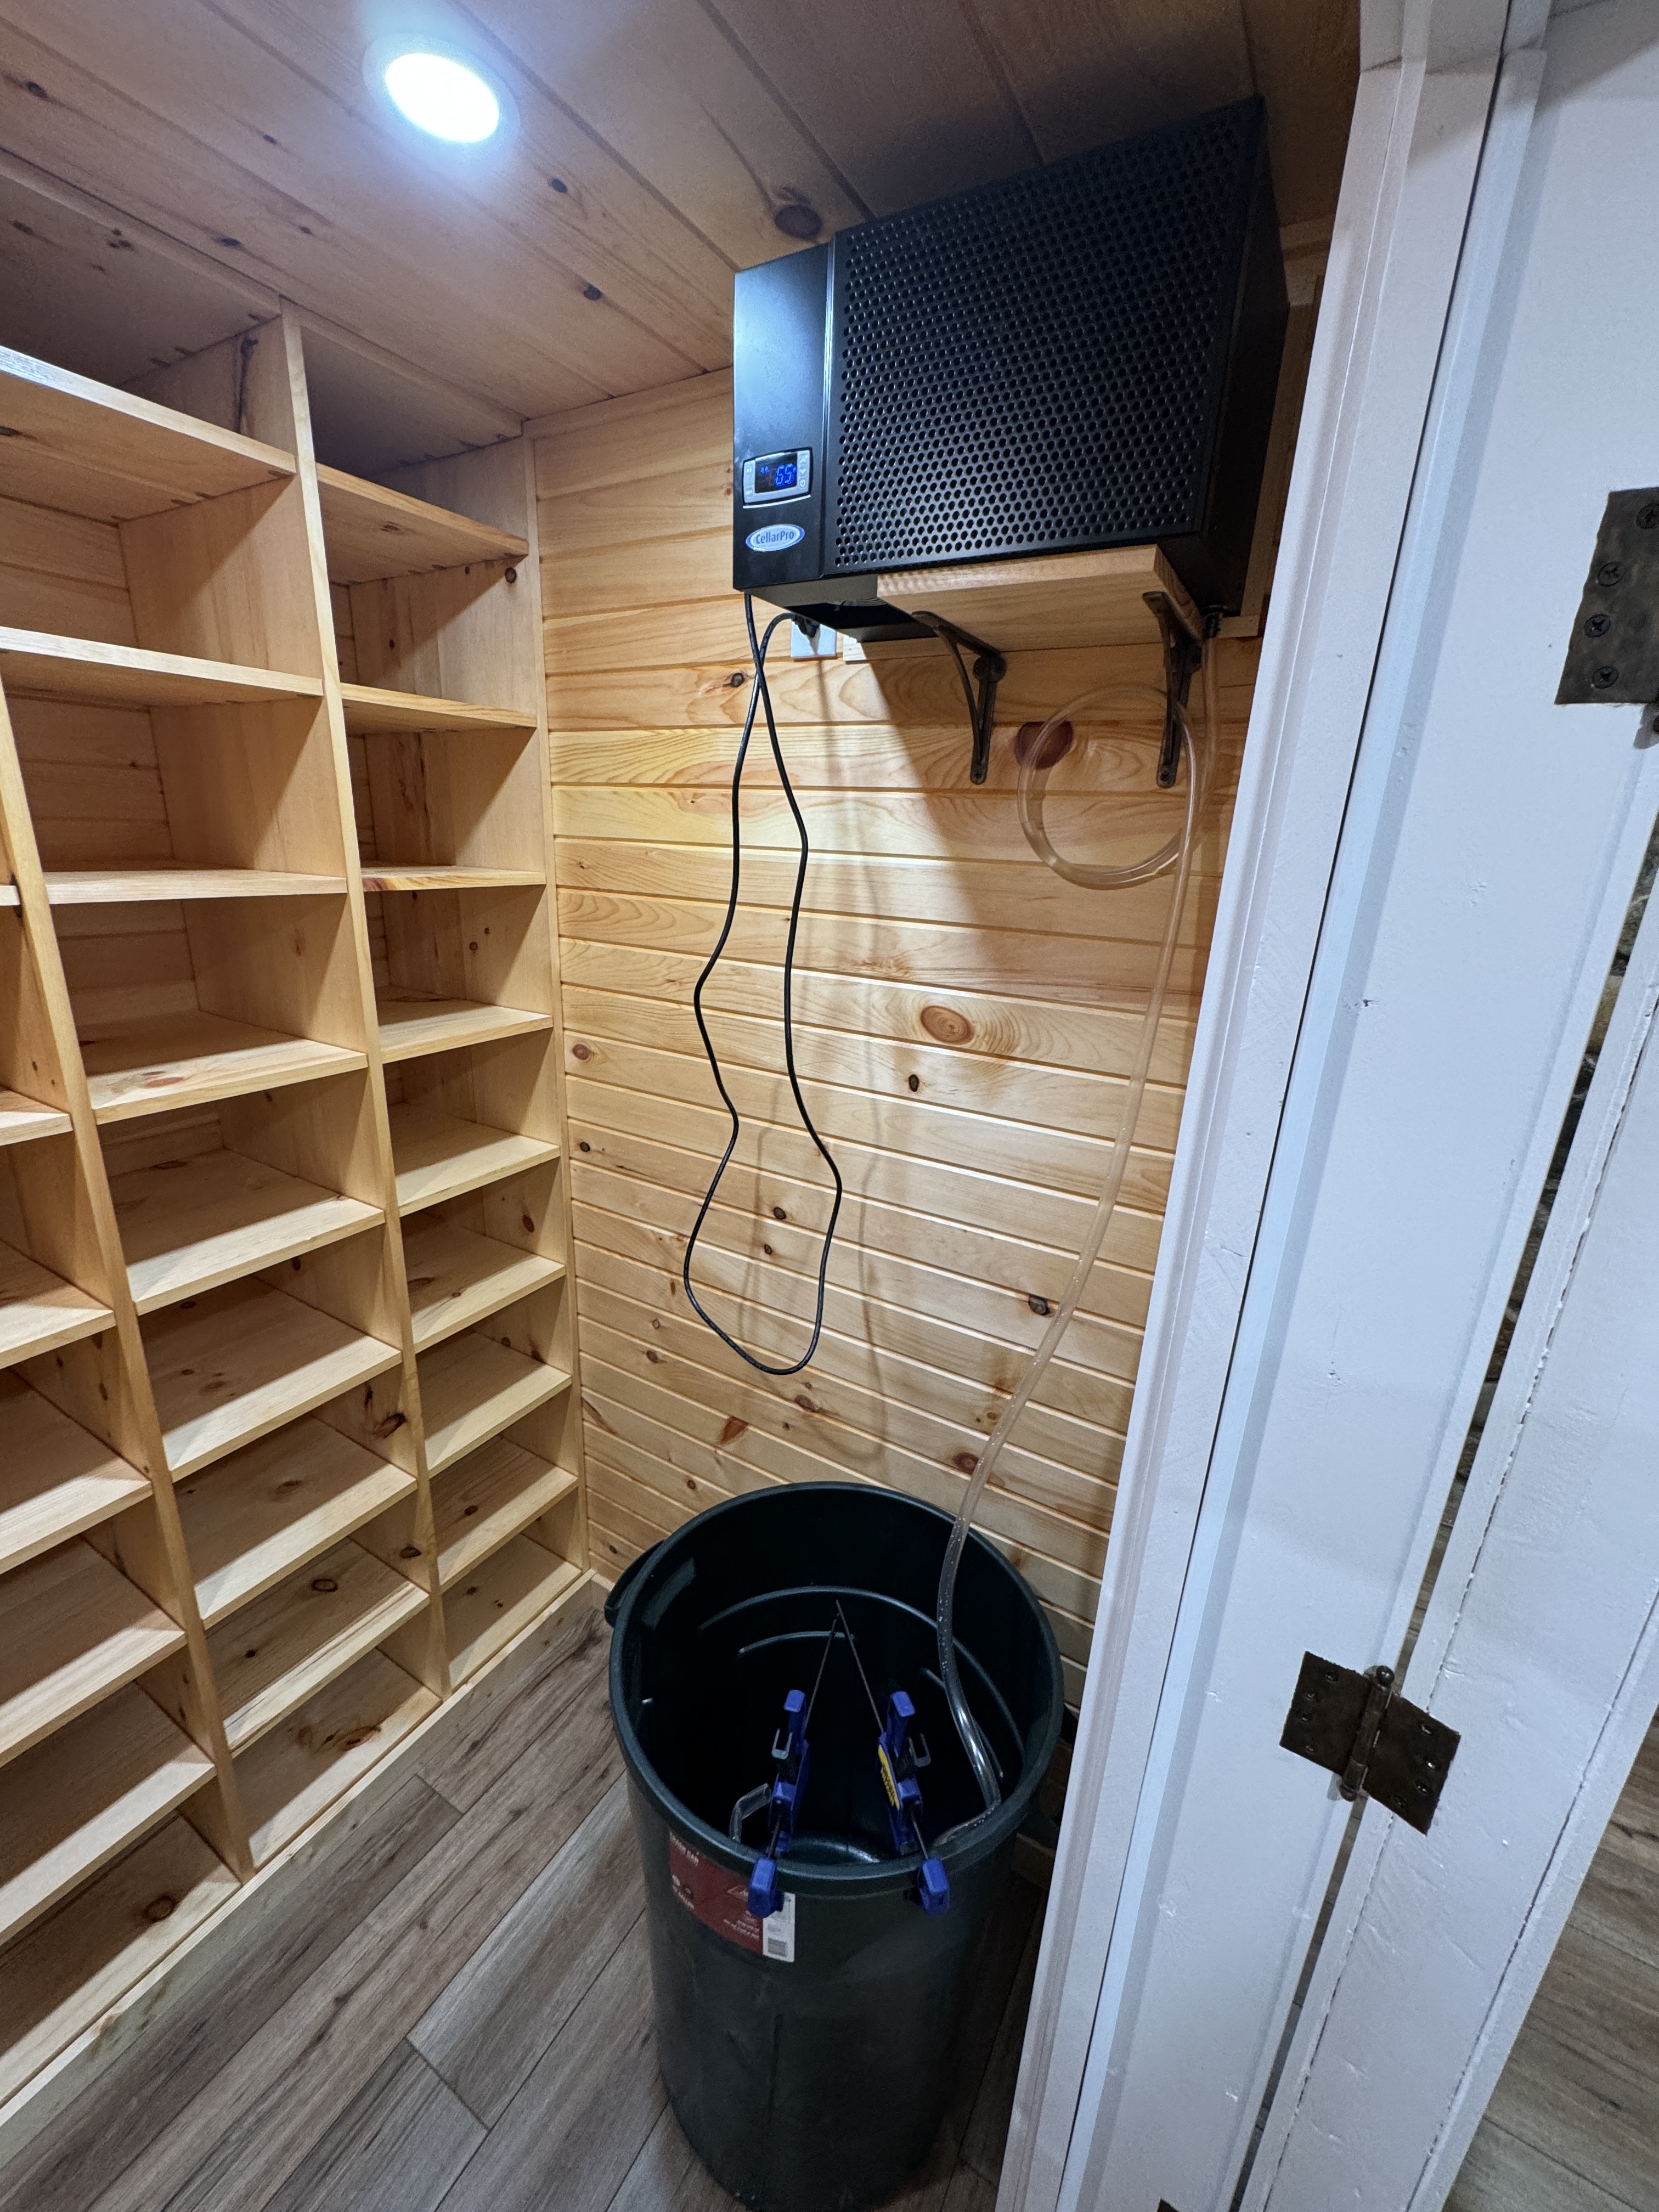
This weekend was all about the refrigeration unit. I built a shelf for the cooling unit, then rebuilt it when I discovered that the drain line wasn’t where I thought it was. Then I trimmed out the hole where the unit is installed, then installed the cooling unit.
The final step was to actually test the cooling unit to make sure everything worked. All the walls are insulated to R-21, and the ceiling is insulated to R-42, so I was pretty sure it would hold temperature. The real worry was the vapor barrier. I was as careful as possible with the vapor barrier, and I was pretty sure there wasn’t any major leaks, but you never know. My nightmare is for the cooling unit to start dumping buckets of water due to a leak.
So I rigged up the condensate line to drain into a trash can—just in case—and fired up the cooling unit. After a 24 hour test, the cellar was holding 55°F and there was just a few drops of water. It works! Huzzah! ![]()
Next step: Filler ‘er up!


16 Likes
Hey all, we are doing a redesign with building of a cellar. The architect keeps showing me pictures of options with lots of glass. Two questions 1. should I be worried about light and 2. is there a particular type of glass that can be used?