Foodies,
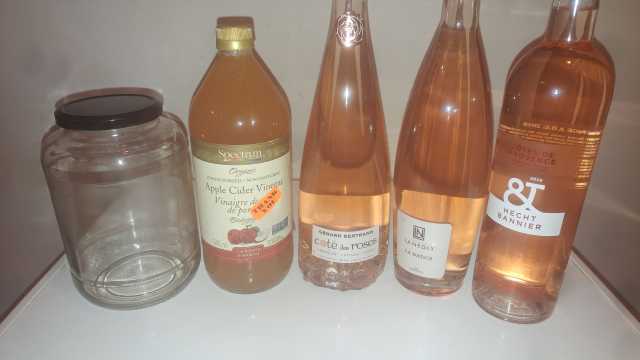
You may recall over in Wine Talk a thread this summer dedicated to manhood sapping Rosé wine. On that thread, I posted that I am too manly to drink the stuff but was happy to buy it due to the beautiful sculpted clear Vinolok glass stoppered bottles which I love using to store leftover wine and freshly made beverages. That, however, means I have a lot of Rosé wine to deal with.
Now I’ve already posted on my Iced Tea-Gria which is blend of Rosé-based Sangria and iced green tea. But I still have 5 bottles worth of Rosé to deal with. What to do? Well, I was struck by inspiration last night on the way home from work last night to finally ferment my own wine vinegar using all that Rosé wine.
Making your own vinegar couldn’t be easier. You just need spring water, any alcoholic beverage, clean non-reactive containers with some width to them, and the most important ingredient of all – unfiltered and unpasteurized cider vinegar that contains mother of vinegar. That and a lot of patience.
HOMEMADE ROSE WINE VINEGAR
TECHNIQUE: Blend one bottle of wine with one cup of unfiltered unpasteurized vinegar that contains mother of vinegar, pour into wide non-reactive containers and wait patiently for it all the alcohol to be converted into acetic acid. Dilute when completed with fresh spring water.
WHY IT WORKS: The beneficial bacteria in the mother starts a second fermentation in the wine that turns the alcohol into acetic acid, the main ingredient in vinegar.
INGREDIENTS
- 3 cups of Rosé wine or any other alcoholic fermented beverage of your choice (you can really use any bottle of dry wine or even beer or cider)
- 1 cup of unfiltered and unpasteurized cider vinegar; make sure the label specifies that the vinegar contains some mother of vinegar
- Clean wide non-reactive containers (glass, ceramic, stainless, steel, wood, etc.)
- Cheesecloth
- Elastic bands or tape
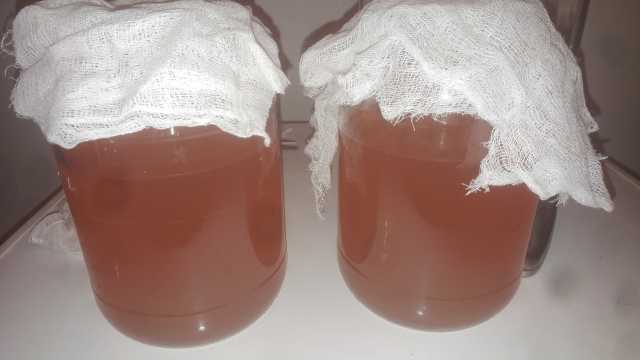
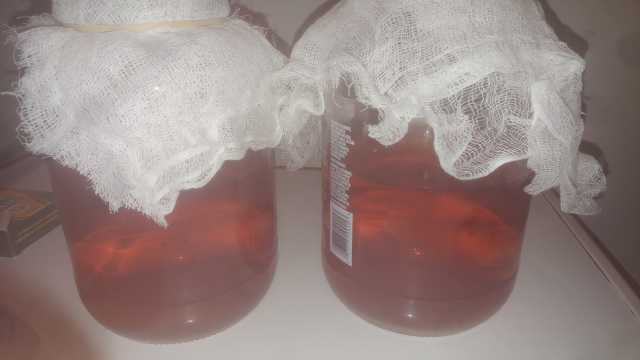
- Pour 3 cups of wine (or alcoholic beverage of your choice) into a clean non-reactive container. MAKE NOTE OF THE ABV%. This will be important in the last step. Try to use a wide one like a crock or a wide mouthed jar as you need lots of oxygen exposure.
- Shake up the vinegar container to make sure you blend the mother of vinegar all throughout the liquid.
- Add the 1 cup of vinegar as your “starter” into the wine and stir with a clean spoon or shake the jars gently to blend. Use the leftover wine as either more starter for another batch or as regular vinegar while you wait for this batch to ferment.
- Cover your container with a large swatch of cheesecloth, enough to drape over the edge of your container’s opening.
- Secure the cloth with either an elastic band or tape so it doesn’t fall off the container or into the liquid itself.
- Wait. A long time. Like weeks or possibly even months. There is no telling how long this will take, it’s up to Mother Nature. If you start to smell nail polish from the containers, that’s a good sign. Taste and monitor as you go. When it tastes like vinegar, it is.
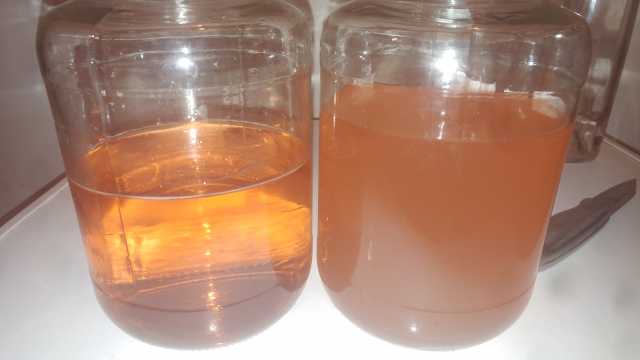
Now here is the key. Once all the alcohol is fermented, you must remember that vinegar has a standard for cooking with is only 5-7% acetic acid. Assuming a standard 12% ABV bottle of wine, you’re looking at 12% acetic acid which is twice as strong as standard vinegar and probably enough to burn your tongue and a hole through your stomach. Once finished, you should dilute the fermented wine down by adding an equal amount of clean distilled or spring water to it to dilute it down to proper strength. On the other hand, if you use beer or cider that already has a reasonable ABV in between 5 and 7%, it’s already at perfect strength. No dilution needed.
My vinegar containers are now safely tucked away in a corner slowly fermenting away. I’m looking forward to updating everyone in the fall as to how the first batch is doing.