Berserkers,
The weather has finally hit 30 degrees C here in Ontario, Canada and it’s time for my personal obsession with fresh homemade ice cream. This summer’s ice cream making has hit a major milestone, however. I have developed a technique that turns out perfect ice cream that does not require the use of a mechanical ice cream maker. That’s right, no dedicated freezing machine needed, no more freezing bowl accessories taking up valuable space in your freezer. The only mechanical device you’ll need is a Kitchen-Aid or hand mixer. For anyone who thinks they’re stuck with store-bought expensive ice cream and/or needs to spend hundreds at William-Sonoma for a dedicated ice cream machine, I promise this will change everything and may even encourage those who would never consider making their own frozen treats to reconsider when you see how easy it is.
THE PERFECT ICE CREAM (NO ICE CREAM MAKER REQUIRED)
TECHNIQUE SUMMARY:
- Whip your cream to stiff peaks and set aside in fridge until needed
- Thicken your liquid milk base with cornstarch and set aside; no need to wait for it to cool
- Make a Zabaglione style whipped egg and sugar custard base over boiling water in order to gently cook it and trap air into it
- Add the hot milk mixture and put the hot custard base back into your mixer and whip at high speed until it’s cool to the touch
- Add in your flavorings
- Turn mixer down to lowest speed and add the stiffly whipped cream to fold in gently
- Pour mixture into prepped container and freeze overnight
WHY IT WORKS
The air trapped in both the custard base and the cream prevents any large crystals from forming while the mixture freezes. You’ve essentially already done two of the three job an ice cream making machine does (whip air into mixture, break up ice crystals, freeze).
INGREDIENTS
CREAM BASE
- 2 cups 35% full fat whipping cream (standard container size)
ZABAGLIONE/COOKED CUSTARD BASE
- 2 eggs
- 1 cup sugar
LIQUID MILK/FLAVORING BASE
- 1 cup liquid milk of your choice + 1 TBSP cornstarch + 1 cup mashed/pureéd fruit; OR 2 cups milk + 2 TBSP cornstarch (see additional tips below) + flavorings
- 1 tsp vanilla (see additional tips below for a Vanilla Ice Cream)
OPTIONAL
- 1 to 2 cups add-ins of your choice (cookie crumbs, marshmallows, nuts, dried fruit, etc. See additional tips below)
EQUIPMENT NEEDED
- Stand mixer with heatproof metal bowl and balloon whisk attachment is ideal; otherwise use a hand mixer with a metal bowl
- Large pot of boiling water
- Freezer-proof container
- Spatulas, measuring cups and spoons as needed
- Hand whisk (you will need this separately for the Zabaglione)
DIRECTIONS
-
Make the cream base. Simply whip 2 cups of whipping cream until stiff peaks form. Scoop out with a spatula into a separate bowl or measuring cup and put into the fridge. You won’t need this until the end.
-
Make the liquid base. Mix the liquid milk of your choice (cow, goat, coconut, almond, etc.) and the cornstarch together until dissolved, heat over the stove until the mixture thickens to the consistency of pudding. Set aside while you go to the third step. This does not have to be cooled down as you will take care of that in Step 4.
Note that your proportion of total liquid/flavorings is 2 cups – exactly the same amount as the whipping cream. So if you are using a cup of puréed fruit or chocolate, use only 1 cup milk and 1 TB starch. If you are flavoring with extracts or spirits (mint, vanilla, rum, etc.) then use a full 2 cups milk and 2 TB starch. Whatever you do the proportional volume must be the same as the cream in the end: 2 cups.
Do not cook the fruit in with the liquid base. If you are using a fruit that must be cooked, like pumpkin for example, cook it separately and purée it.
- Make the Zabaglione custard base. In the same metal bowl you whipped the cream in (don’t even bother to waste your time to clean it, this is unnecessary), whip the sugar and eggs until thick and yellow. Move the bowl over your pot of boiling water and whisk with the hand whisk.
Note that this will start to stiffen quickly due to the high sugar and low egg content, so as soon as you feel this happening, slowly pour in the thickened hot milk mixture. Now continue whisking and cooking until everything is incorporated, thick, fully cooked, and the air bubbles are fully visible as you whisk the mixture. When the mixture no longer thickens you’re done.
Note that as long as no direct heat is applied to the mixture in the bowl, there is virtually no chance you will burn, curdle or otherwise ruin this step. So make sure you don’t boil your water away. Don’t worry, you likely won’t be cooking for that long anyway.
-
Move the still hot bowl immediately to the mixer and immediately start whipping it up at the highest speed. The residual heat will continue to cook it while even more air gets whipped into the thick custard. As you continue mixing, the constant influx of rapid velocity air will cool down the mixture which will thicken even more as it cools down. Keep mixing until the metal bowl is completely cool to the touch on the outside. Expect anywhere from 5-10 minutes.
-
Add the vanilla extract now to the cooled mixture. IF you are using fruit as a flavoring, add the cup of puréed fruit once the entire mixture is cooled down. Fold it in gently at low to medium speed until fully incorporated. If you are using extracts or spirits to flavor instead, add them now but make sure the mixture is cooled down.
-
Take the whipped cream out of the fridge. Gently fold it into the mixture at the lowest speed possible on your mixer by scooping it in a bit at a time with your spatula. Once the whipped cream is fully incorporated, the mixture will be doubled in volume and quite airy with the consistency of a mousse.
-
Pour the mixture into a freezer-proof container. Make sure it’s enough to hold all of the mixture. If you have any add-ins, now is the time to gently fold them into your mixture.
-
Put the container in the freezer and patiently freeze it overnight.
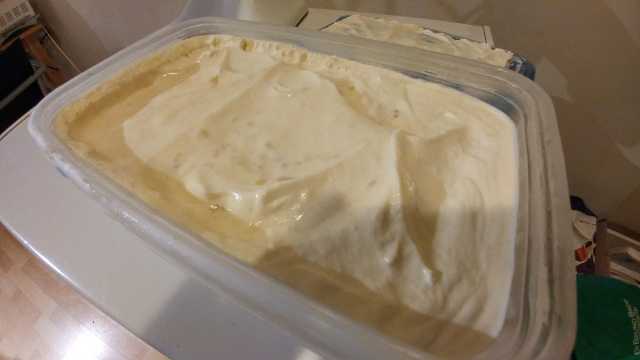
And here’s a look below and earlier above at a couple of finished products. The first pick is of the Banana Ice Cream I just made before posting this. The second is of the Neapolitan (strawberry, vanilla, chocolate) Ice Cream I made last weekend. Enjoy the pics and I’ll be back to talk some science and recipe variations below.
