Homemade Kosher Deli Pickles -- Made via Fermentation

Foodies,
A week ago, I was stopping by the Loblaws at Bayview Village near me and noticed they had a truckload of fresh Ontario dill cucumber baskets. We’ve been having a summer-like early start to Fall with the temperatures in the high 20’s (Celsius for you heathen Yankees) resulting in us having an extended local produce season with fresh berries, plums, peaches and nectarines still showing up in our local grocery stores.

So I’m eyeing these baskets and get the sudden inspiration to make real fermented Jewish kosher deli pickles like my late grandma Rita used to make. She was a Romanian Jew who exceled at making traditional Jewish foods like dill pickles, latkes, verenikas, matzo ball soup, cabbage rolls and so on.

Now I’ve made standard brined refrigerator pickles before by boiling water, salt, pickling spices and cider vinegar together and then filling a jar with fresh cucumbers and pouring the brine over them. 4 days later after infusion, you have fresh refrigerator pickles which are really good in and of themselves and better than anything you’ll buy off of a non-refrigerated store shelf in your local grocery store. But fermented pickles are the real Jewish kosher deli deal. So I bought two 4 litre baskets which gave me 34 pickles of varying sizes and set out to make freshly fermented ones.

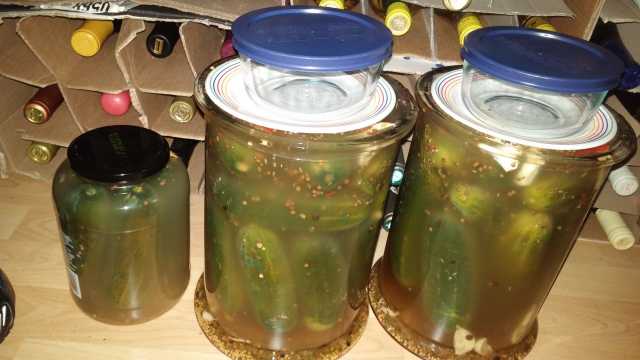
The first and most important step was finding NON-REACTIVE containers to make these in. You should really only be using glazed ceramic or glass containers for your pickles. So I used two recycled and cleaned supermarket standard pickle jars and two large old-fashioned pharmaceutical glass storage jars. I washed the pickles and then placed them in the jars.

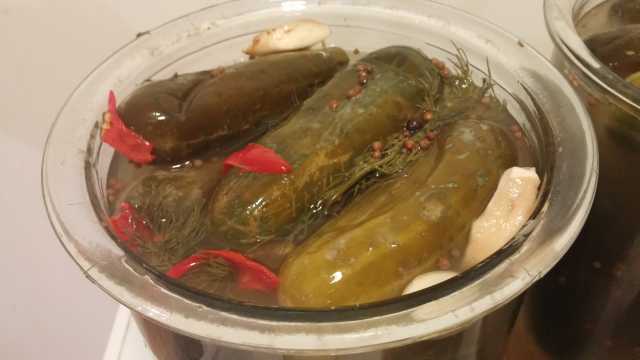
Next step was choosing the aromatics to flavor the pickles. Truthfully, all you need is salt brine and standard packaged pickling spices to make pickles but that’s really boring. Real koshers need some kick to them so I settled on fresh dill, lots of fresh garlic, dill seeds and the magic ingredient: Thai red chili peppers for some spiciness.

Next came the brine. I researched a lot of recipes on the Internet and I wasn’t convinced by any of their proportions. The basic problem is that salt kills the bad bacteria but can also ruin the taste of your pickles of too much of it is used. So striking the right balance was necessary. I ended up using Alton Brown’s recipe of ½ cup non-iodized salt to 1 US gallon (16 cups) of bottled water. DO NOT USE TAP WATER, it’s got chlorine and other crap in there that will ruin your pickles. I heated 1 quart of water and dissolved ½ cup of Pink Himalayan salt in it and then added the rest of the water to cool it down and be able to jar right away.

So the proportion went as follows in the large crocks:
• 12-14 fresh dill pickles of varying sizes
• 1 bunch fresh dill
• 6 large cloves of garlic
• 4 Tbsp pre-packaged pickling spice
• 1 Tbsp dill seed
• 4 Thai red chili peppers

For the smaller 2 L jars, I just cut the above proportions in half. Then I filled the two crocks and jars up to the brim with brine. For the crocks, I placed a small saucer plate on top to hold the pickles under but chose not to use the covers to let the CO2 escape and not have a pickle bomb mess on the floor. For the jars, I just place the standard lid on top without screwing it on tight.
20150920_151129.jpg
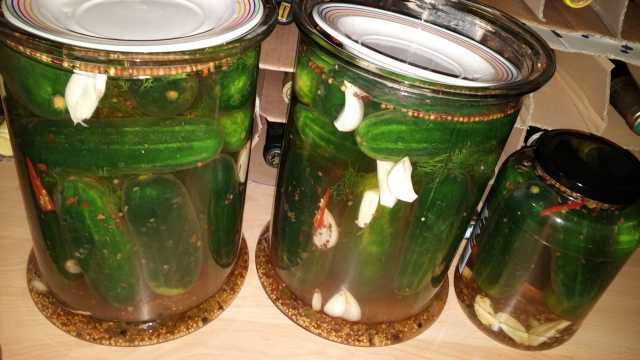
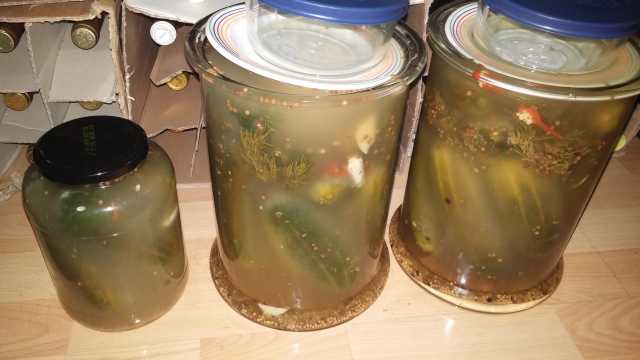
As you can see by my pictures, fermentation started the very next day as the brine got cloudly and just kept going from there.
20150923_000617.jpg
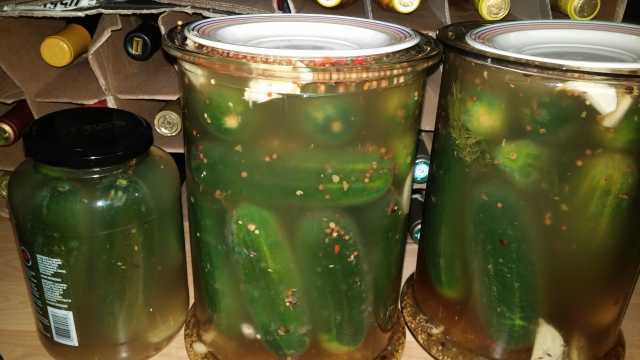
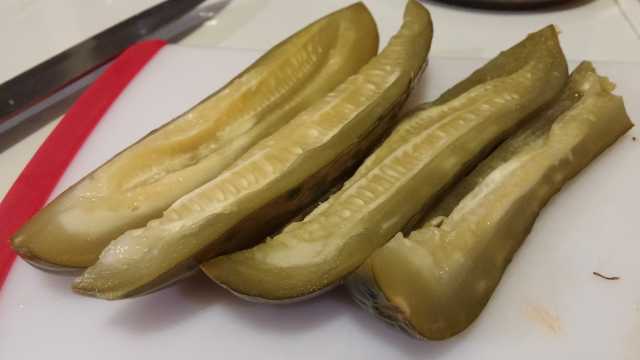
On the third day, I had the foresight to taste both the brine and the pickles via a small slice of one to see how they were doing. I could actually hear the bubbling going on so I knew lactic fermentation was happening. There was nowhere near enough salt for my taste so I added two more tablespoons to each crock and one more to each jar. Next time I am doubling the amount of salt to make a brine of 1 cup salt to 1 gallon water. I also had to weight down the plates with some Pyrex containers just to keep them under the brine.
20150924_080635.jpg

By the fifth day, the pickles were floating at the top and the brine was actually overflowing so The bubbling was still happening but less noisy so I figured things would be done soon.

Today was the 8th and final day (I jarred everything last Sunday morning); the bubbling had completely stopped, the pickles were all floaty and there was no more overflowing. Notice that you can see the dill weed now which was squeezed in the middle between all the pickles. Things have moved around so much that the dill is free to float around in the brine. Time for a final taste test, cleanup and refrigeration.
20150927_133446.jpg
As you can see by the photos, the color of the pickles is excellent as they are a nice bright translucent green. The pickles have weight to them and are not soft and mushy. The ones that remain, that is, I did have to throw one away which literally fell apart in my hand as I checked it. This prompted me to check the solidity of all of the others and fortunately they were fine.
20150927_164151.jpg
Taste wise, these suckers are loaded with dill and garlic and Thai pepper spiciness. They’re really, really spicy. The finish lasted forever after I was done eating a slice. In fact, they’re rather akin to Kimchee in their spiciness and flavor. This level may not be to everyone’s liking so you might to tone it down by using just half the number of Thai peppers in the recipe.

One thing I want to mention is that I did not use calcium chloride in the recipe. This is a matter of taste. Calcium chloride firms up the pickles and makes them crispier but my grandmother never used it so I decided not to either. The result is the pickles are a little softer than you would find in the grocery store and without that extra firmness, the core of each pickle has been affected with pockets caused I presume by the gases leaving the vegetables during the fermentation process. Maybe I’ll use it next time just to see how it goes.

Overall I’m pretty happy with how these came out. So now I have the trifecta of being able to make my own Jewish deli bagels, Montreal style smoked meat and now Jewish kosher deli pickles. I should just open up my own delicatessen.
20150927_165211.jpg

Thanks, Tran. I loved my grandmother’s fermented pickles

Looks excellent. I tried once many years ago and they all got mushy so I gave up. I have a large gallon glass jar from commercial pickles I bought for a charity food event I can use. I see wine bottles in the background of the picture. What was the temperature of the room where you did the pickling?

Jay, the temperature was a cool and steady 15 degrees Celsius – perfect for wine storage and fermentation for pickles and sourdough. :slight_smile:

what causes the fermentation opposed to a regular brined pickle?

Lacto bacillus. If you do not pasteurize and leave it open to air it will lacto ferment.

This is indeed correct. My research also shows that there is natural bacteria and yeast on the skins of most vegetables that will get the process going rapidly. It is possible to pickle many other types of vegetables including carrots, zucchinis, green beans, radishes, and green tomatoes.

As a side note, remember the large garlic cloves I threw in for flavor? Well those obviously ferment and pickle alongside the cucumbers and they’re pretty darn tasty too. Next time I’ll throw in some extra just so I can wind up with bonus pickled garlic. flirtysmile

I currently have a test run of red scotch bonnets, habaneros, serranos, and garlic fermenting for a run of stupidly hot sauce. All of the hot peppers were from my garden.

There’s bacteria on/in the vegetables. If you submerge them in brine, the salt in the brine keeps things like mold and other bacteria at bay but it let’s certain types of lactobacillus work on the sugars that are present in the vegetables. They eat the sugars and produce CO2 and lactic acid, which drops the pH of the brine and keeps other nasties at bay. Cucumber pickles, sauerkraut, etc. all work this way. Pickled that use a vinegar brine instead are trying to emulate what happens with actual fermentation. You can ferment pretty much any vegetable this way. Some work better whole and others work better cut into smaller pieces.

Sometimes you just add salt to the vegetables (like adding salt to cabbage to make sauerkraut) and let the salt draw out the liquid content out of the vegetables and then keep the vegetables submerged. Other times you make a salt brine and submerge the vegetable in them. The real key is keep them submerged in the brine (or you’ll get mold) and don’t over salt them. The colder they are, the longer it takes, the warmer they are, the faster it goes. If they’re too cool, they ferment too slowly to build up enough acidity before other organisms start to make them go bad. If they ferment too hot, sometimes they don’t develop the right flavor because everything goes too quickly. I’ve seen stuff saying 55-75F is ideal. I normally go high 50’s to mid 60’s and they work OK. I mostly do sauerkraut but have attempted dill pickles which were good but not great.

When I’m lazy I still do vinegar pickles.

I may try it this weekend. Does washing the dukes before putting in the brine take away the needed bacteria?

if charlie was korean, he’d know about kimchi! :wink:

No, you can wash them first. The bacteria is also inside of the cucumbers (and some will remain on the outside even after you wash them).

I would avoid using soap. A water rinse is fine. A trick to getting the ferment started more quickly is to add a little sauerkraut juice. That has the secondary benefit of leaving you with a batch of sauerkraut to cook.

+1 to Rachel and Kenny above. A good water rinse in a colander is all the washing you need to get things going.

Also, in terms of using sauerkraut juice, make sure it comes from GENUINE sauerkraut, not one that has been treated with brine.

I know how to make kimchi but it doesn’t bubble up and overflow

I just bought one of these at the Portland VegFest and it lets you use any wide mouth canning jar as a crock for making pickles or krauts. Just started another batch of kraut today using it and so far it works really well. Usual disclaimers: no affiliation, no monetary interest, etc. If this one turns out well, I will likely buy a few more: http://fermentn.com/

It’s a ceramic weight that fits in a canning jar (to keep food under the brine) and a plastic airlock that is held in place by screw cap for the jar. Kind of nice if you like to do smaller batches of things (it will fit pint, quart or half gallon wide mouth jars)